1. Kaleidoscope Quilt possible layout, 2. kaleidoscope baby Valerie, 3. Completed Kaleidoscope Front, 4. Kaleidoscope Layout #2, 5. Blocks in Progress, 6. Front quilted, 7. KQAL Quilt top, 8. Kaleidoscope Top, 9. Baby kaleidoscopes
When it comes to finishing your quilt, there's four basic steps: making/purchasing a quilt back, basting your quilt sandwich, quilting, and binding.
I'm a fan of pieced backs. I know, it can be tedious to piece a quilt back, after piecing a top, but think about it this way - it's a great way to use some scraps you've created in cutting fabrics for your quilt top, and it's also a way to exercise your creativity. See what you've got and make it work! For my quilt, I took 3 yds of a coordinating print for my quilt, and added a 16" strip of scraps from the front of my quilt. I'm really happy with how the back turned out on this one. If you're thinking about trying a pieced back, here's a little mosaic of some of my favorite recent quilt backs...
1. Hexagon Quilt Back, 2. Innocent Crush Diamonds Back, 3. Urban Lattice quilt - the back, 4. Wrapped in Hope quilt - back, 5. Fall Equinox quilt - back, 6. Supernova - the back, 7. Lattice Quilt Back, 8. Modern Crosses baby finished back, 9. Back of the Make Life Coin Quilt
Now that you've made a quilt back and cut a piece of batting to go with, it's time to make your quilt sandwich. I'm a big fan of spray basting. My knees just don't like pin basting, nor does my back. Spray basting saves me not only time but some sanity, too. It's really quite simple to do, but if you've never done it before, check out my bloggy buddy Kristie's fantastic spray basting tutorial - the only thing I do differently is that I add a few pins around the outside edges of my quilt sandwich, just to be on the safe side.
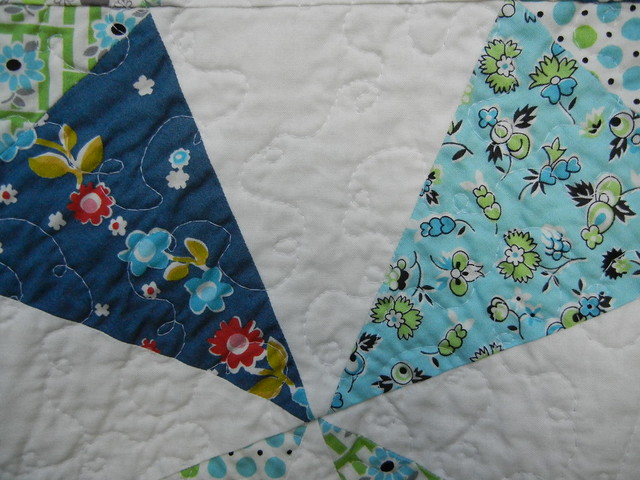
Once you've basted, it's time to start quilting. I'm a free-motion quilter most of the time, especially for large projects. While I love how straight-line quilting looks, I get bored when I quilt that way, so I like how free-motion quilting keeps me moving constantly. Usually, I go for a meandering stipple, which is like an "S" turned and twisted throughout the quilt, but for this one, I went with little loops - though my toddler says that the quilting is a bee's path. If you're interested in trying free motion quilting for the first time, or you are still fairly new at it, you might want to pop over to read a few tips for FMQ'ing that I wrote a while back. If you're more interested in straight line quilting, Amy wrote a great tutorial that should help you get started.
Binding is kind of a personal choice. I tend to stick with 2.5" strips for my binding, and I machine them on to the back of the quilt first, then flip it over and machine it on to the front as well. I do occasionally do the reverse, and machine to the front and hand-stitch to the back for a cleaner finish, but I never trust the security of my hand-stitching, so I prefer the machining method. Emily wrote a fantastic tute for finishing your binding 100% by machine, I highly recommend it.
I can't wait to start seeing finished quilts appearing in the Kaleidoscope Quilt Along gallery! You can link up your finished quilt here, and I will be drawing a random quilt finisher to win these fantastic Anthology fat quarters.







0 comments:
Post a Comment
Thank you for leaving a comment for me! I appreciate each and every one of them and try to respond when time allows. Your comments totally brighten my day :)