Showing posts with label quilt along. Show all posts
Wednesday, January 8, 2014

Close but no cigar

So, the holiday season has come to a close again...and sadly this wasn't the holiday season where I finished my Kawaii holiday cross stitch sampler :( I did make a good bit of progress, though! Check it out...

Almost finished my holiday cross-stitch sampler!


I've got just two squares remaining in the sampler, so I feel pretty sure that I will be able to finish it before next Christmas comes and goes. It was awfully enjoyable to work on it during the holidays, so I might just save working on it for the next holiday season. Maybe I'll start up a new hand sewing project in the meantime to tote around with me on my various outings.

A little quilt along perhaps? Check the blog for details...

Or maybe I'll work on some quilt math... I'm thinking of doing a quilt along later this spring, I've got a fun, simple block that can create several different fun geometric repeats, so stay tuned for more info on this in February! Have a great day :)
Tuesday, November 8, 2011

It's All About the Presents Block Tutorial


Welcome to my little corner of blogland for my block in the 12 Days of Christmas Sampler Quilt Along!  Thanks, Sara, for asking me to contribute!  Today, we'll be making a cute present block, which I've called It's All About the Presents.  I can remember, as a little kid, obsessing about presents at Christmastime.  Despite our often bumpy family finances growing up, my parents always managed to make Christmas memorable.  In our house, Christmas meant a lot of things - it meant making Christmas cookies with my mother, attempting to Christmas shop with my father who despised shopping, wrapping presents in a way that would make Martha Stewart proud with my mother, waking my dad up on Christmas morning when I inevitably, as the baby of the family, woke up at 6am.  Christmas really isn't all about the presents, it's about family...but it sure is fun to wrap up some pretty presents, especially with fabric!!  Let's get to some sewing, shall we?

DSCN7540

It's All About the Presents Block Tutorial
Block size: 12.5" unfinished


You'll need:
Various red and green printed scraps
Various scraps solid red at least 1.5" wide
Various scraps solid green at least 1.5" wide
1 fat quarter of white/neutral

Note: You will use a 1/4" seam for all piecing in this block tutorial.

1. Start by ironing your scraps and sorting them by size and color.  You'll be making two rectangular log cabins from each color.  First, find a rectangular piece you'd like to feature in the center of your log cabin.  It should be approximately 2" x 3".  Next, find coordinating scraps to go around your rectangle, with various widths for visual interest.  My narrowest width in the block below is 1.5", and the widest is 2.5".

DSCN7515

2. Seam your log cabin together, taking one log at a time in a clockwise fashion and pressing your seams open as you go, like so...

DSCN7517


DSCN7518


DSCN7519

3. Next, bring your log cabin over to your cutting and mat and trim it down to 4" tall by 5" wide.  Find the center point of the width your log cabin, which would be the 2.5" point.  Cut down the center, creating two pieces measuring 2.5" wide by 4" tall.

DSCN7511

4. Let's add in a strip of ribbon.  Take a 1" x 4" strip of a solid holiday color and seam it to one side of your halved log cabin.  You can then flip the other side of the log cabin over, to create a different patchwork look to your present before seaming it to the opposite side of your ribbon.  Press seams open.

DSCN7512

5. To create the ribbon at the top of your presents, take one neutral 1.5" square and pair it with a 1.5" square of your ribbon color.  Draw a line down the diagonal center of your neutral square and place right sides together with your ribbon square.  Seam a scant 1/4" seam on either side of the line you've drawn, and then cut down the line to create two HSTs.  Press seams open and then trim each HST to a 1" square.

DSCN7504

Take your two ribbon HSTs and place together as shown below.  Seam together.

DSCN7513

Next, cut two rectangles from your neutral solid, measuring 1" x 1.75".  Seam one on either side of your ribbon to create a strip of ribbon 1" x 5" to go on top of your present.

DSCN7520

6. From your neutral solid, cut one 1.25" x 6.5" rectangle (for the top of your present), one 1.75" x 6.5" rectangle (for the bottom of your present), and two 1.25" x 4.5" rectangles (for the sides of your present).

DSCN7521

First, add the side neutral rectangles to your present.  After you press seams open, add the top and bottom rectangles, making sure to use the skinny one for the top.

DSCN7508

Repeat steps 1-6 for the other three quadrants of the block.

DSCN7523

Place your four mini-blocks in an order you're happy with, then seam each right/left pair together.  Press seams open, and seam each row together, pressing your final seams open, creating a complete 12.5" block. 

Ta da!  

DSCN7540

I hope you enjoyed this little block tutorial, I had a lot of fun making it for you.  Don't forget, there are still plenty of days left in the 12 Days of Christmas Sampler Quilt-Along.  Here's the schedule for the quilt-along, and I do hope you'll join in!

Oct 25 - Julianna @ Projektownia Jednoiglec
Oct 27 - Sara @ Sew Sweetness
Nov 1 - Kaelin @ The Plaid Scottie
Nov 3 - Jennie @ Clover and Violet
Nov 8 - Elizabeth @ Don't Call Me Betsy
Nov 10 - Riel @ The Q and the U
Nov 15 - Jennifer @ Ellison Lane Quilts
Nov 17 - Lindsay @ Lindsay Sews
Nov 22 - Jessica @ SewCraftyJess
Nov 23 - Sarah @ Fairy Face Designs
Nov 29 - Heather & Megan @ Quilt Story
Dec 1 - Kim @ My Go Go Life

Merry Christmas to you and happy sewing!
Thursday, July 21, 2011

Kaleidoscope QAL: Wrapping it up

It's time to wrap up the Kaleidoscope Quilt Along this week!  I'll be wrapping things up in two posts - this one here, with your instructions for finishing up your quilt, and a second post with my finished quilt and a place to link up your finished quilts momentarily.  If you haven't stopped by the Flickr group yet, you absolutely should.  There is some serious eye candy to be seen over there!!  I love how different each quilter is making their Kaleidoscope, this is precisely what makes quilt-alongs so much fun.


When it comes to finishing your quilt, there's four basic steps: making/purchasing a quilt back, basting your quilt sandwich, quilting, and binding.

I'm a fan of pieced backs.  I know, it can be tedious to piece a quilt back, after piecing a top, but think about it this way - it's a great way to use some scraps you've created in cutting fabrics for your quilt top, and it's also  a way to exercise your creativity.  See what you've got and make it work!  For my quilt, I took 3 yds of a coordinating print for my quilt, and added a 16" strip of scraps from the front of my quilt.  I'm really happy with how the back turned out on this one.  If you're thinking about trying a pieced back, here's a little mosaic of some of my favorite recent quilt backs...


Now that you've made a quilt back and cut a piece of batting to go with, it's time to make your quilt sandwich.  I'm a big fan of spray basting.  My knees just don't like pin basting, nor does my back.  Spray basting saves me not only time but some sanity, too.  It's really quite simple to do, but if you've never done it before, check out my bloggy buddy Kristie's fantastic spray basting tutorial - the only thing I do differently is that I add a few pins around the outside edges of my quilt sandwich, just to be on the safe side.

Once you've basted, it's time to start quilting.  I'm a free-motion quilter most of the time, especially for large projects.  While I love how straight-line quilting looks, I get bored when I quilt that way, so I like how free-motion quilting keeps me moving constantly.  Usually, I go for a meandering stipple, which is like an "S" turned and twisted throughout the quilt, but for this one, I went with little loops - though my toddler says that the quilting is a bee's path.  If you're interested in trying free motion quilting for the first time, or you are still fairly new at it, you might want to pop over to read a few tips for FMQ'ing that I wrote a while back.   If you're more interested in straight line quilting, Amy wrote a great tutorial that should help you get started.

Kaleidoscope - quilting close-up

Binding is kind of a personal choice.  I tend to stick with 2.5" strips for my binding, and I machine them on to the back of the quilt first, then flip it over and machine it on to the front as well.  I do occasionally do the reverse, and machine to the front and hand-stitch to the back for a cleaner finish, but I never trust the security of my hand-stitching, so I prefer the machining method.  Emily wrote a fantastic tute for finishing your binding 100% by machine, I highly recommend it.

I can't wait to start seeing finished quilts appearing in the Kaleidoscope Quilt Along gallery!  You can link up your finished quilt here, and I will be drawing a random quilt finisher to win these fantastic Anthology fat quarters.

Quilt Along Giveaway!
Saturday, June 18, 2011

So...I caved :)

So, last night, I caved and decided to try a few Farmer's Wife blocks, as part of the Farmer's Wife Quilt Along that's been sweeping blogland as of late.  I picked up the book earlier this week at the library when I stumbled upon it, and last night, I felt the urge to try it out.  I printed out some templates and gave it a go, starting with the first two blocks, because I'm an orderly kind of person like that. Cutting out the templates was a minor annoyance (how hard would it have been to just write simple rotary cutting instructions for a 2" square, for instance?), but other than that, I really enjoyed whipping up these blocks.  It took very little time, and I think they're pretty cute.

DSCN4540
Block #1: Attic Windows

I think I'm going to take a totally scrappy approach to these blocks.  The color palette for these two blocks was totally inspired by one of my favorite Anna Maria Horner prints that happened to be in my scrap bin - Small Gathering in Sea.

DSCN4543
Block #2: Autumn Tints
Doing two of these little blocks a week feels totally do-able, so I'm actually happy to have caved in to join this quilt-along.  I haven't done many traditional blocks in my quilting life, so I think it will be good practice for me and I'm sure I will learn a lot in the process of working on these blocks.

DSCN4548
Saturday, April 16, 2011

April Friday Night Sew In: The Results

Handmade by Heidi


OK, so this month's Friday Night Sew In didn't exactly go as well as last month.  In fact, I didn't manage to sew a single stitch.  But, I did get a lot done, believe it or not!!

All stacked and ready to sew - two hours later!

I spent a lot of time preparing for sewing.  I cut all of my fabric for the pieced backing that I have planned for the back of my Supernova quilt, totally based on Jeni's amazing Plus quilt from last year.  That was one of my first favorites when I started using Flickr last year, and it's been on my To Make list since then.  I had so much It's a Hoot leftover after the Supernova quilt that I wanted to make another quilt top basically for the back of this quilt.  Here's hoping I can pull off making the seams line up.

Supernova back in progress

My dog was positively freaked out about all of the fabric all over the floor.  He sat in front of me, shaking, pretty much the entire time that I was working on laying out the squares.  Now that I'm all done, he's calmed down, chilling out on the couch, but he was just so bothered by how busy I was tonight.  It was so strange!  He's always been neurotic, but this was a new level of neuroses.

Stacks of fabric apparently freak out my dog

The other thing I worked on was ironing the fabric for my queen bee month in the String Me Along bee next month.  I still haven't 100% decided on what I'm going to do, but I am using the fabric I showed first on WiP Wednesday.  Now that I've ironed it all, I hope that will force me to make a decision and start cutting!

Fabric for String Me Along?

ETA: BTW, you must hop on over to Sew Fresh Fabrics' blog, as they are holding a seriously major giveaway.  A medium flat-rate box full of scraps!!!  That's more than enough to make a whole quilt!!  Tell them I sent you :)
Monday, March 14, 2011

Itching for another quilt along?

I know I am!  Since I finished my Sliced Coins quilt along, I've been itching for another quilt along.  Why?  It's just a lot of fun to tackle a quilt with another group of people - that's one of the things that has made the Single Girl quilt a lot more enjoyable to work on.

Supernova Quilt-Along with Freshly Pieced

One of my favorite bloggers and dear friend, Lee, is hosting her own quilt along, based on her gorgeous Hope Valley quilt.  I'm so excited about this quilt along!  I love that quilt and I can't wait to quilt along with her.  Hop on over to her blog and join in the fun, she'll be announcing the fabric requirements tomorrow.  :)
Friday, February 18, 2011

Sliced Coins Quilt Along: Gallery of Finishes


Sliced Coins Quilt Along
Week One: Introduction & Materials
Week Two: Cutting Instructions
Week Three: Assembly
Week Three point five: Sashing
Week Four: Quilt Backs, Quilting, and Binding
Week Five: Gallery of Finishes

First off, can I just say a big thank you to all of you who have participated in the Sliced Coins Quilt Along so far??  This quilt along has been so much fun, and I hope you've enjoyed quilting along with me, too.  I am so excited to see your finished quilts!

Do you have a finished quilt yet?  You do?  High five!  Link it up below for a chance to win a $25 gift certificate from Sew Fresh Fabrics as a special thank you for participating in my first ever quilt along.

If you're not all finished just yet, that's A-OK, this drawing will be open until 2/27, so you've still got some time to wrap it up.  Come on back over and link up as soon as you're done, and I'll announce a winner first thing on 2/28.  Good luck!

Friday, February 11, 2011

Sliced Coins Quilt Along: Backings and Quilting

This is the final week in the Sliced Coins Quilt Along.  Have you had fun?  I sure hope so, I know I have.  I'm so proud of all the amazing finished quilt tops I'm seeing for the quilt along!  It makes me so happy to see how many people are participating and how much they're enjoying this quilt pattern.

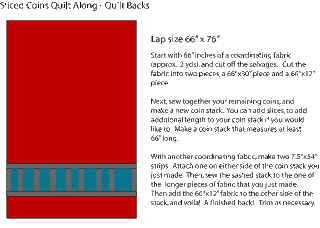
A part of me really likes making quilt backs, trying to use up scraps from the quilt top and making them work in a new way.  Another part of me dreads making quilt backs, because sometimes it feels a little bit tedious to me.  I've done a lot of different things for quilt backs in the last year and I've also seen a ton of awesome ones on Flickr - here's some of my favorites for inspiration.


Since you more than likely have extra coins, I went ahead and did some math for you all for a quilt back, to use up those excess coins and make a scrappylicious kind of quilt back.  I've also PDF'd the instructions for you, to make things even easier, just click on the picture below to access the PDF.


Now that you've got a quilt back, it's time to baste and quilt!  Basting is my least favorite part of quilting!    Jennifer wrote a really comprehensive basting tutorial during her quilt-along last year - That Girl...That Quilt's Basting tutorial - and I highly recommend it.

As for quilting, I'm more of a free-motion kind of girl.  Don't get me wrong, I like straight-line quilting, but free-motion quilting is relaxing to me.  I would be perfectly happy putting my earbuds in, turning on my iPod, and free motion quilting all day.  That sounds quite awesome, actually.  I learned to free-motion quilt from Elizabeth Hartman's quilt patterns, they're very thorough, but the basic gist is this - practice the motif you want to quilt (i.e. loopy, stipple, circles, etc.) on paper first.  Practicing on paper is really helpful, even if it feels a little silly.  Randi wrote a fantastic free-motion quilting tutorial last year that will really help you free-motion, if it's your first time.

If you're interested in straight line quilting, there's two great tutorials to see - Amy's simple straight-line quilting tutorial and Katy's wavy quilting tutorial.  Both are very beginner-friendly.

I can't wait to see how these quilts turn out!  In fact, I'm so excited to see these quilts finished up that I'm going to hold a giveaway for those of you who finish your quilts!  You'll be able to enter in the giveaway linky starting next Friday 2/18 and ending on Friday 2/28.  I'll be giving away a gift certificate to Sew Fresh Fabrics for $25 to a lucky random winner.  Thank you, Peg & Becca!


Need some fabric now?  They're running an awesome free domestic shipping special for orders over $35 right now until 2/14 to share the Valentine's love!

P.S. - I entered my finished Sliced Coins quilts in the awesome Love Nest quilt show over at Gen X Quilters - go check it out and vote!  If you want to vote for me, I'm #11, but there are a ton of awesome quilts to see, so hop on over and see for yourself :)
Monday, January 31, 2011

Two finishes for the price of one

Ta da!  My Sliced Coins twin quilts are officially complete!


I'm so excited to share these quilts with you.  Why am I excited?  Other than the obvious super fun sensation of finishing off a new quilt, there's several reasons...

1. These quilts are going to my newest cousins, Kayla and Tristan, who were born in December (so I'm a bit behind!).
2. My first quilt finish for 2011 is a two-fer!
3. I'm actually checking something off my list of lofty quilty goals for this year.
4. I really loved working on these quilts.  These fabrics are so fun to play with; just seeing them every day made me smile.


Don't ask me to pick a favorite, it's just not possible.   I really love both of these quilts.  It was a lot of fun to get to play with lots of pink fabrics in Kayla's quilt for once, but I also really love all of the gorgeous blues in Tristan's quilt.  My son really covets that quilt; fortunately, there's a new quilt in the works for him, so I don't think he'll be too upset to see me ship this one off.

I had so much fun making these quilts that I am seriously considering making one more, so I can have something around my house to remind me of this super fun quilt-along.  And I definitely need to get my hands on more of Laurie Wisbrun's fabrics, they're just so much fun!

Quilt Stats
Size: approx. 54" x 57"
Pattern: Sliced Coins Quilt by me
Fabrics: Laurie Wisbrun's Urban Circus, Ann Kelle's Remix, Alexander Henry's 2D Zoo, Joel Dewberry;s Aviary and various Kona solids

I'm linking up this week with a few different things...{Sew} Modern Monday and Gen X Quilters' Love Nest quilt show.

{Sew} Modern Monday at Canoe Ridge CreationsGen X Quilters
Friday, January 28, 2011

Sliced Coins Quilt Along: Assembly

Welcome to the second week of the quilt along.  If you're just joining the quilt-along, please click here to visit the cutting instructions and here for the materials list.

Now that you've got your fabrics all cut up, I imagine you're just dying to start putting your quilt together.  This week, we're going to be laying out our coin stacks and adding our slices.

Do you have a design wall?  I do, but I actually didn't use it for laying these quilts out - it's becoming more of a landing strip for all of my works in progress at the moment.  If you're interested in a design wall and don't have one yet, there's lots of options - a flannel sheet works great and so does the back of a vinyl tablecloth because they're usually flannel.  Mine is a Fons & Porter Design Wall that I happened to get a ridiculous deal on.  I highly recommend having a design wall, I don't know how I ever quilted without one!
A table top can work well as a design space too!

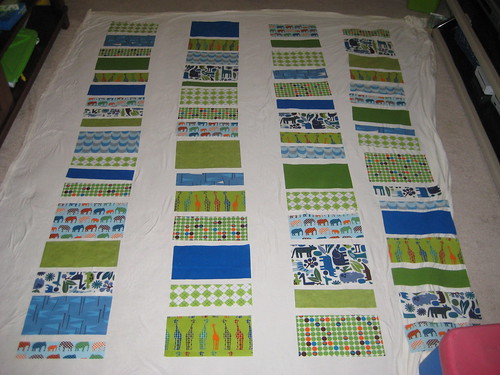
You can use a floor, or a sheet, or whatever works for you.  Use a measuring tape to measure on your work surface how long your stack of coins ought to be.  Use the figures, but keep in mind the math includes the slices, so you will need to trim your stacks when completed.  

Finished stacks will measure (including slices):
  • Baby - 42 1/2"
  • Crib - 52"
  • Lap - 66"
For each quilt, you'll be putting together four stacks of coins.  Play around with this.  Mix up your fabrics and mix up your coin slices.  Don't get too caught up in the layout, though, your quilt is going to look fantastic!

This is what happens when you don't have a design wall...
A sheet can make a great little "design floor"
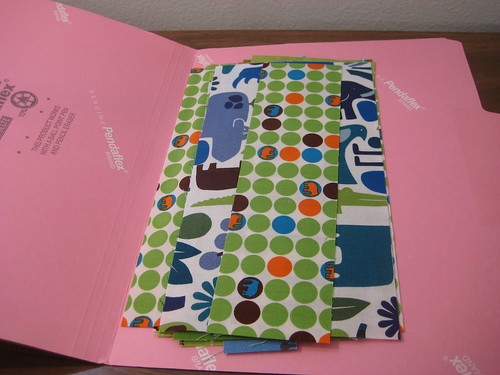
When you're satisfied with your layout, stack your coins one on top of the other from bottom to top.  Make sure to keep them oriented correctly, if any of your fabrics are directional.  Your bottom coin should be at the bottom of the stack and your top coin at the top.  Keep your rows separate.  I used file folders to keep everything straight and labeled each folder in two ways - a row number or letter (I used letters) and a sticky note reminding me that the coins are top to bottom.

IMG_4838IMG_4839

Next, take your file folders to your sewing machine, and grab a stack of your 1" neutral slices. 

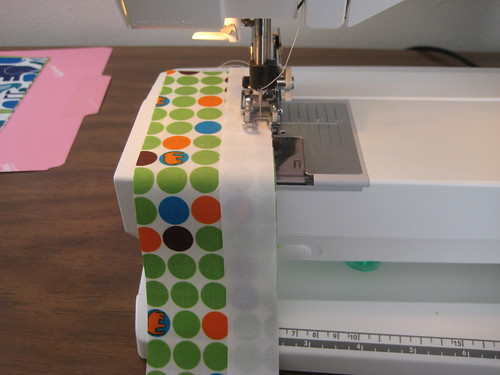
Add a slice to the bottom of each coin, with one exception - do nothing with your bottom coin, which should be at the bottom of the stack.  So, if you have 13 coins in your stack, you will add 12 slices.  Got it?

IMG_4840

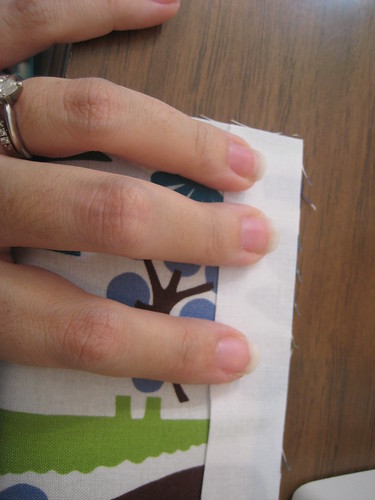
Keep your coins in order.  I suggest chain piecing them, and laying them face down as you trim them from your chain to ensure they stay in order.

Next, finger press (or press with an iron, your choice) the seams you've just created on both sides.

IMG_4841

Lay your coins back in their file folder in order, with your top coin on top and your bottom coin on the bottom.


Continue to chain piece your coins and slices together until your stack is complete.  Your stack should start with a coin and end with a coin.  Press the entire stack well and label with a small piece of painter's tape or masking tape with the letter or number assigned to the stack.  I'm a press-seams-open kind of girl, but you do what you are most comfortable with.  Set aside your completed stack and grab the next file folder to do it all over again.  When you're done, you'll have four completed stacks.  Their lengths may vary slightly - don't worry about that right now, we'll fix them up and make them even next week.

IMG_4850

Next week, we'll be tackling sashing.    And then, you will have a completed quilt top!  Yippee!  Don't forget to link up your progress next Thursday and in the Flickr group as well.  Have a wonderful weekend :)
Friday, January 21, 2011

Sliced Coins Quilt Along: Cutting Instructions

I cannot even begin to explain how excited I am about getting started on this quilt-along today!  Today, we're going to start cutting into that beautiful fabric I've seen you all collecting on Flickr.  By the way, it's not too late to join in the quilt along fun!  Grab a button from my sidebar, join the Flickr group, and let's get started.


Now, remember, there are three different quilt sizes we're talking about here, so there's three sets of cutting instructions.  Here we go!!


Cutting your fat quarters:
Baby & Crib size quilts -
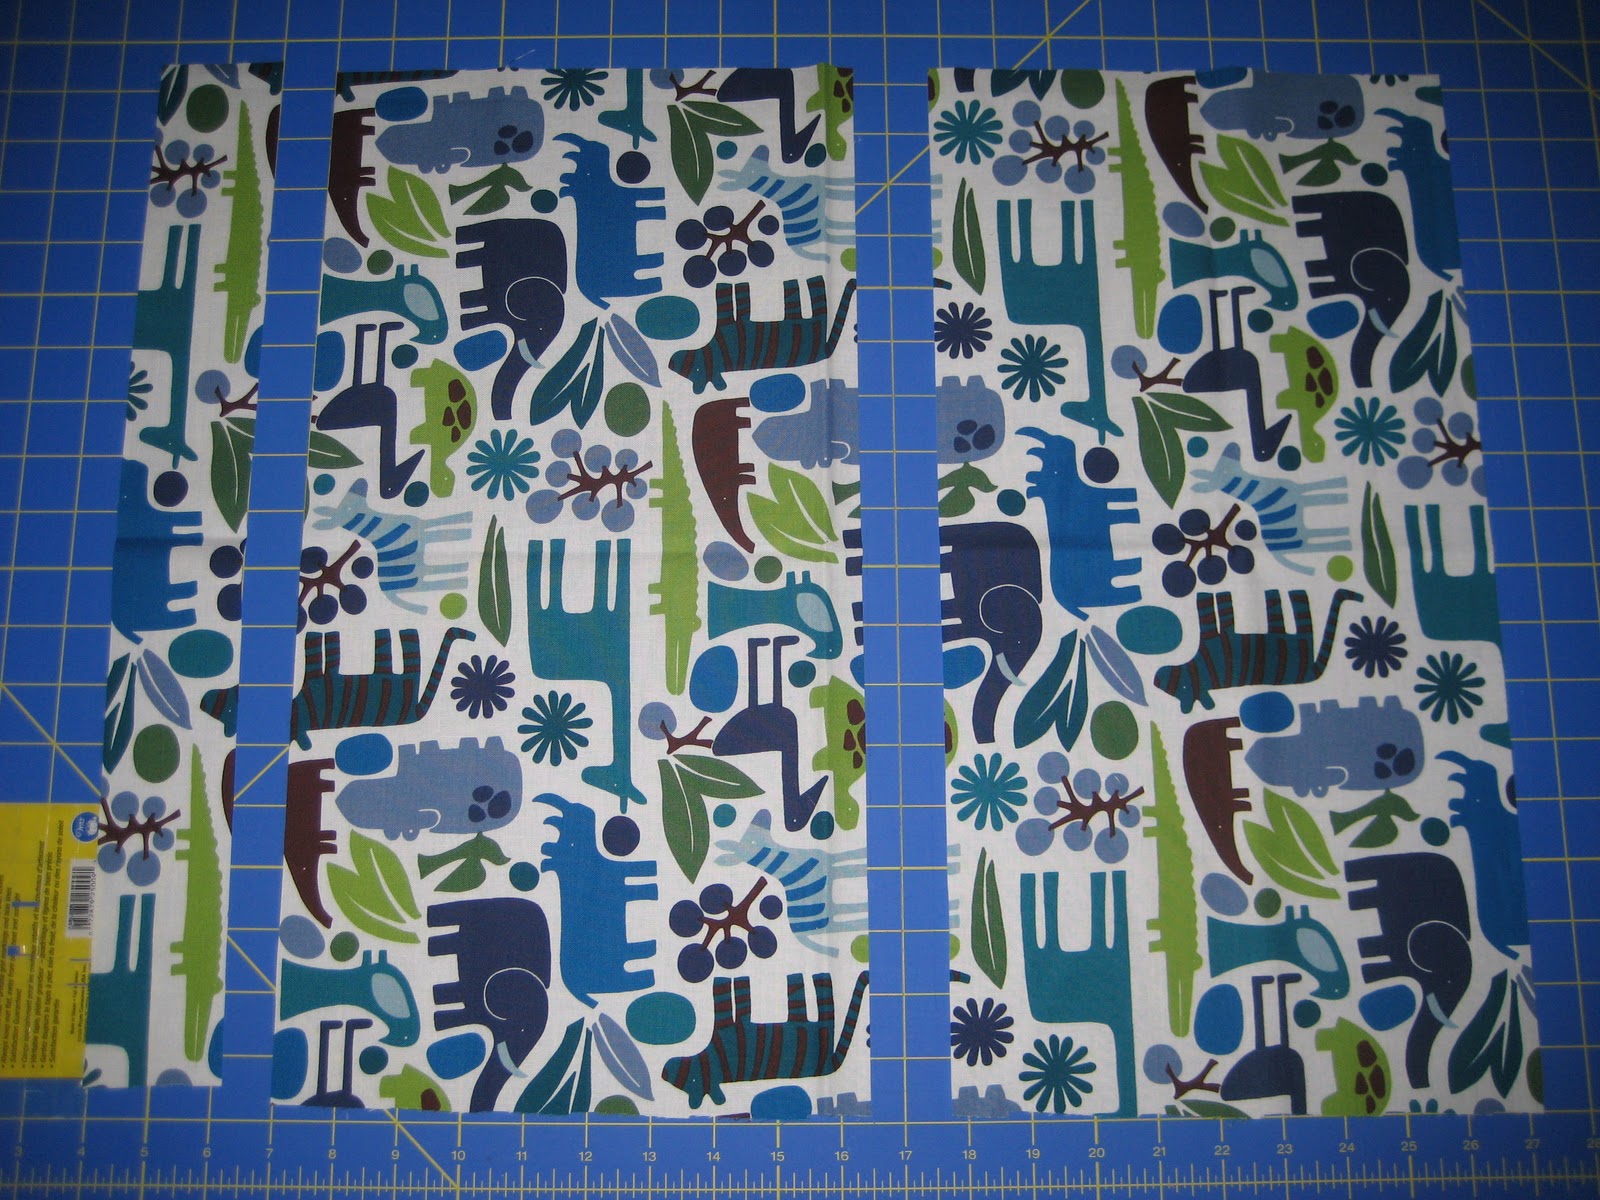
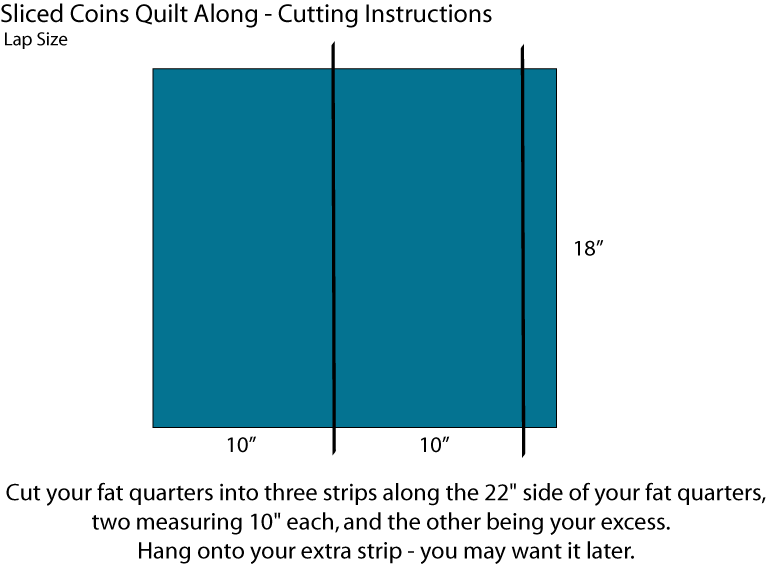
Cut your fat quarters into three strips along the longer, 22" side of your fat quarters - two measuring 9 1/2" each, and the other being your excess.  Hang onto your extra strip, you may want it later, depending on how big it is.


Lap size quilts - 
Cut your fat quarters into two 10" wide strips along the wider side of your fat quarters, which should be 22".  Hang onto your extra strip, you may want it later, depending on how big it is.  If you're using a layer cake, you won't need to make these strips, skip right to the next step.


All - 
Once you have your strips, the instructions are the same for each quilt.  You will now make your coins, by cutting your strips into randomly sized pieces.  Here's how I did it - I made five different sized coins, 8", 5", 4", 3" and 2".  You can choose whatever sizes you would like, and in fact, you can stagger the sizes depending on the size of the print on your fat quarter.  Try to keep your coins stacked together with like fabric (despite the difference in sizes) for layout purposes.

For the baby size, you will need approximately 35-45 coins.  For the crib size, you will need around 55-65 coins.  For the lap size, you will need around 60-70 coins. You will wind up cutting more than this, and we will use the extra coins to piece together a quilt back.


Cutting your sashing:
Baby - 
From your sashing, cut the following:
  • 3" x 37" - quantity of 2
  • 3" x 43" - quantity of 5  **UPDATED QUANTITY**
From what remains, cut into 1" strips, then cut those down to 1" x 9 1/2" pieces. These will be your slices for your coin stacks.  Make sure to have at least as many as you have coins.


Crib - 
From your sashing, cut the following:
  • 3 1/2" by 55" - quantity of 2
  • 3 1/2" x 52"" - quantity of 5  **UPDATED QUANTITY**
From what remains, cut into 1" strips, then cut those down to 1" x 9 1/2" pieces. These will be your slices for your coin stacks.


Lap -
From your sashing, cut the following:
  • 5 1/2" x 66 1/2" - quantity of 2
  • 5 1/2" x 66" - quantity of 5 **UPDATED QUANTITY**
From your remaining sashing, cut 1" strips, and then cut those strips into 1" x 10" pieces. These will be your slices for your coin stacks.


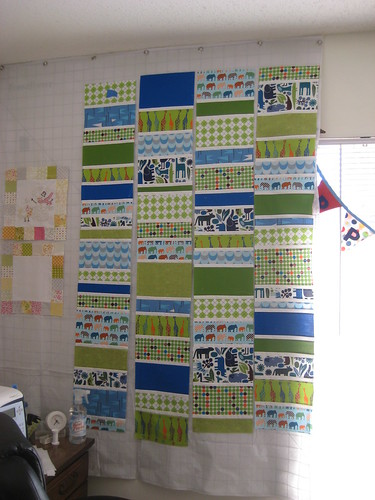
Want a sneak peek of how your finished top is going to look?  Here's my boy twin sliced coin quilt top.  


Next Thursday, I'll host a linky so you can show off your cutting prowess.  Next week, we'll work on layout and assembly of the coin stacks.  Happy cutting!  I can't wait to see all of those fantastic stacks of cut up fabric.  Here's mine :)


Welcome! I'm Elizabeth, mom to a mood teen boy and a chatty six-year-old girl and I sew for my sanity. Let's get to quilting, shall we?
The Epic Sampler BOM Club kicks off Oct 1st
Copyright 2010 by Elizabeth Dackson. Powered by Blogger.

Search This Blog

Tutorials

 photo Icicle-Star_zps7f032133.gif  photo Boxed-In2_zps800ae9da.gif EasyPeasyFauxZigZag StringHeartBlock StarCrossed CrossMAze CathedralStar RainbowRing DoubleFlip PatchworkWheel FriendshipOctogon FlyingGeese HST Weathervane MarinersStar StackedScrappyBlock ScrappyAngles HolidayPresentBlock DivideandConquer CharlestonFarmhouse ModernHalves ModCircuitry ModNine Kaleido SlicedCoins Kaleido BellaCrossing SweetGirlie MiniBookshelf ClamshellLoop DoubleHourglass BaptistFan TetrisMug StringDiamond ScraptasticTote OffsetDiamonds MunchkinSoftBook PatchworkBathMat