Welcome to the second week of the quilt along. If you're just joining the quilt-along, please click here to visit the cutting instructions and here for the materials list.
Now that you've got your fabrics all cut up, I imagine you're just dying to start putting your quilt together. This week, we're going to be laying out our coin stacks and adding our slices.
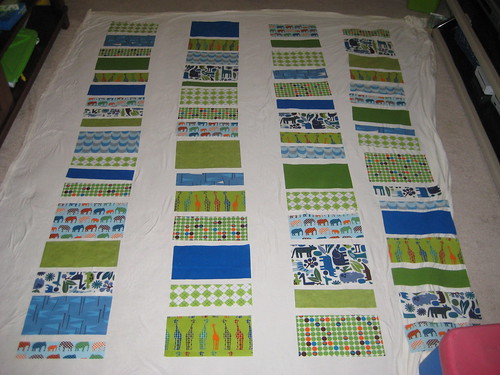
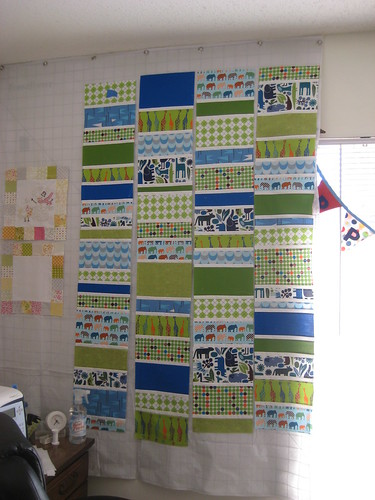
Do you have a design wall? I do, but I actually didn't use it for laying these quilts out - it's becoming more of a landing strip for all of my works in progress at the moment. If you're interested in a design wall and don't have one yet, there's lots of options - a flannel sheet works great and so does the back of a vinyl tablecloth because they're usually flannel. Mine is a Fons & Porter Design Wall that I happened to get a ridiculous deal on. I highly recommend having a design wall, I don't know how I ever quilted without one!
 |
You can use a floor, or a sheet, or whatever works for you. Use a measuring tape to measure on your work surface how long your stack of coins ought to be. Use the figures, but keep in mind the math includes the slices, so you will need to trim your stacks when completed.
Finished stacks will measure (including slices):
- Baby - 42 1/2"
- Crib - 52"
- Lap - 66"
For each quilt, you'll be putting together four stacks of coins. Play around with this. Mix up your fabrics and mix up your coin slices. Don't get too caught up in the layout, though, your quilt is going to look fantastic!
|
| A sheet can make a great little "design floor" |
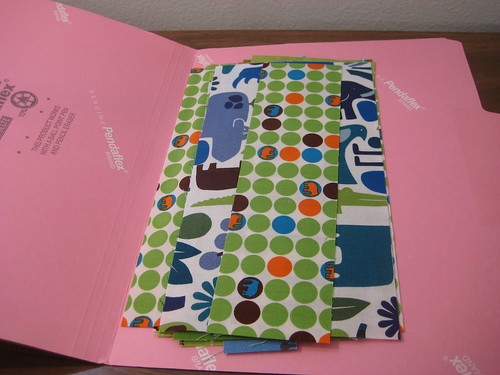
When you're satisfied with your layout, stack your coins one on top of the other from bottom to top. Make sure to keep them oriented correctly, if any of your fabrics are directional. Your bottom coin should be at the bottom of the stack and your top coin at the top. Keep your rows separate. I used file folders to keep everything straight and labeled each folder in two ways - a row number or letter (I used letters) and a sticky note reminding me that the coins are top to bottom.

Next, take your file folders to your sewing machine, and grab a stack of your 1" neutral slices.
Add a slice to the bottom of each coin, with one exception - do nothing with your bottom coin, which should be at the bottom of the stack. So, if you have 13 coins in your stack, you will add 12 slices. Got it?
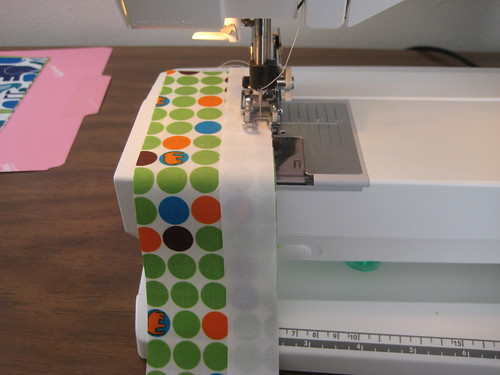
Keep your coins in order. I suggest chain piecing them, and laying them face down as you trim them from your chain to ensure they stay in order.
Next, finger press (or press with an iron, your choice) the seams you've just created on both sides.
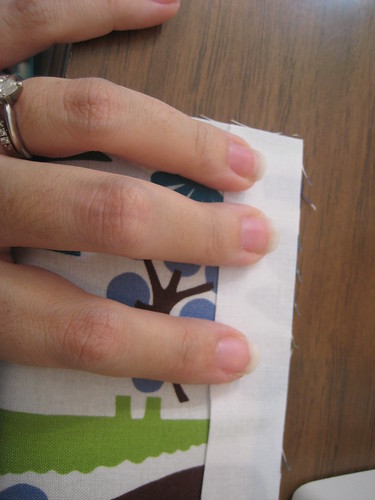
Lay your coins back in their file folder in order, with your top coin on top and your bottom coin on the bottom.

Continue to chain piece your coins and slices together until your stack is complete. Your stack should start with a coin and end with a coin. Press the entire stack well and label with a small piece of painter's tape or masking tape with the letter or number assigned to the stack. I'm a press-seams-open kind of girl, but you do what you are most comfortable with. Set aside your completed stack and grab the next file folder to do it all over again. When you're done, you'll have four completed stacks. Their lengths may vary slightly - don't worry about that right now, we'll fix them up and make them even next week.
Next week, we'll be tackling sashing. And then, you will have a completed quilt top! Yippee! Don't forget to link up your progress next Thursday and in the Flickr group as well. Have a wonderful weekend :)


Ooh very exciting ! I still need to finish cutting the slices ! Fingers crossed I still have some coal left for the back !!
ReplyDeleteCan't wait to get work over with so I can play!!! Thanks, Elizabeth!!
ReplyDeleteGreat instructions - I've never thought to use file folders to keep the fabrics organized! Thanks!
ReplyDeleteMichelle
I love the file folders idea! I'm totally going to do that with future quilts :)
ReplyDeleteExcellent! I'm ready to get these slices together!
ReplyDeleteYum! I hope to tackle this step over the weekend. ::fingers crossed:: :) Have a great weekend!
ReplyDeleteThis is looking great! When I get caught up on a few projects, I'm going to jump in here...
ReplyDeleteJennifer :)
Oh, I can hardly wait to get started! But alas, I must. *dramatic sigh*
ReplyDelete