Friday, February 28, 2014

Welcome to the Rainbow Dance Party

Psst - Make sure to scroll down to the bottom of this post for a great giveaway!!

Who doesn't love a fabric rainbow?! When RJR Fabrics got in touch with me about being part of their blog hop to celebrate their solids collection, I had the perfect project in mind, something that required a beautiful rainbow of solids...

Rainbow Dance Party quilt top

There's nothing like a cheery fabric rainbow to make you smile, am I right? I had a lot of fun cutting into these solids and sewing them together. I've used a lot of different solids since I've been quilting, ranging from rough fabrics that are nearly impossible to press to super smooth almost silky solids, and the RJR Cotton Supreme Solids are a good middle grade solid - not so smooth that they're slippery but not rough and sandpaper-y either. They're quite soft and drape nicely, and they don't require loads of Best Press to get the wrinkles out. They press quite nicely and I enjoyed working them, and sewing up them up into  quilt top.

Rainbow Dance Party quilt top - the artsy view

I'm calling it the Rainbow Dance Party quilt, thanks to some valuable feedback from a friend. How fun is this top?! I'm really looking forward to quilting it up, using a bunch of coordinating Aurifil threads. I'm just waiting for my orange to arrive and then I'll be getting started on the quilting.

RJR Cotton Supreme Solids

I used the following colors from RJR's Cotton Supreme Solids collection:
49 - Chili Pepper
140 - Ochre
182 - Lemon Chiffon
249 - Sprout
251 - Anemone
331 - Pink Orchid
110 - Red Wagon
276 - Tangerine Dream
92 - Goldenrod
349 - Aloe Verde
296 - Electric Blue
286 - Ruby Slippers
34 - Black
You can find many of these colors in stock at Pink Castle Fabrics.


Do you love a good fabric rainbow too? Then you're in luck, because RJR is generously giving away a bundle of these fabrics to one lucky reader. All you need to do is enter the Rafflecopter giveaway below! Tell me about an all solids quilt you've sewn up, and if you haven't sewn up a solids quilt before, tell me why. This giveaway will end next Thursday, March 6th, at 11:59 PM, and a winner will be announced on Friday, March 7th.


Thanks to the wonderful folks at RJR for providing me with the fab solids for this quilt top and for the fantastic giveaway! Have a great Friday and a wonderful weekend :)

a Rafflecopter giveaway
Wednesday, February 26, 2014

A bit of chain paper piecing: The Smashing Star


It's nearly the end of February, and that means it's nearly time for a new Lucky Stars block! And I'm so thoroughly in love with this block that I just can't wait until the end of the week to show it to you. Say good morning to the Smashing Star...

Lucky Stars BOM March 2014 block: The Smashing Star

Every time I make a new Lucky Stars block, I wind up with a new favorite, and this one is no exception! I'm seriously head over heels for this block and am hoping to make a few extra ones this weekend just for fun. With just six pieces on each template, this is a paper pieced block that has an intricate look without too much fuss.

I love blocks that are beautiful that come together quickly. Don't we all?! When I'm paper piecing, I find that the bulk of my time is spent in planning out the block and cutting fabric. Once I get to the actual piecing, I assemble my blocks using chain piecing, or the assembly line technique, which makes things move way, way faster. After I glue my first pieces of fabric to the un-printed side of all of my templates, I then piece all of my A templates, adding the A2 pieces to all four of my templates, trimming and pressing, then the A3s, and so on and so forth. Chain piecing when paper piecing also reduces my odds of making mistakes by placing all of a certain piece just right before switching gears to set up the placement of the next piece.


Lucky Stars BOM March 2014 block: The Smashing Star

This block will go out to Lucky Stars subscribers first thing Saturday morning so you can spend your weekend paper piecing. Have a great day today!
Wednesday, February 19, 2014

Sewing Studio Q&A

I've gotten a lot of questions over the last week since I posted recent pictures of my sewing studio that I thought I'd answer in a blog post, in case you might be wondering the same thing as another fellow reader!

My design wall sits perpendicular to my stash, right behind my sewing worktable

Q - Where did you get those bookshelves for your fabric?
A - Those are Billy bookcases from Ikea, with the optional glass doors. I built the bookcases, but when it came time to add the doors, I got a little nervous about working with the glass, so my husband did that part. That being said, these are not the most sturdy bookcases in the world, but for the moment, they're the size I need and look I wanted, so they work for me.

Billy bookcases under construction

Q - How tall is your cutting table? Does it kill your back?
A - My sewing table and cutting table back up to one another to make an extra large flat surface for when I'm quilting, which I love. My sewing table was custom built for me, so the legs were made just the height I wanted them to be, but my cutting table is a regular desk, sitting up on big blocks of wood to make it about 36" tall, which is the right ergonomic height for me to be able to cut without bending over. It's roughly about kitchen counter height. It was one of the first things I wanted to change about my cutting table, as it's always been a regular desk, and it's one of my favorite things about my sewing room these days because I can cut and cut and cut without any back problems.

Wooden blocks to make my cutting table taller

Q - Can you tell a little more about the cube shelves in your closet? I've been trying to find a set of cubes to fit in my closet but the sizing is all wrong. What do you have and how big is it?
A - I'm a Target girl, and those cubes are straight from their organization section. They are the ClosetMaid Cubeicals 12-cube organizer, which measures right about 48" tall x 36" wide x 12" deep.

My newly built (by me!) cube bookcase for my scrap bins and my Featherweight in my sewing closet

Q - What size fabric do you consider to be a scrap for your scrap bins? Do you save all your scraps?
A - I used to be real finicky about this, but now my rule of thumb is pretty much fat quarter or smaller, it goes in the scrap bin. I destashed most of my fat quarters last year, as I kept getting frustrated that they weren't half-yards like the rest of the bulk of my stash, so I've relegated the small number of fat quarters I still have to the scrap bins. As for what scraps I choose to save and choose to toss, I try to think about usability and how likely I am to use it again. So, for instance, when I have weirdly shaped scraps from paper piecing, I take a look and think to myself, is this a fabric I really love and want to reuse, in spite of the strange shape/size? If so, I keep it. If not, I put it in a pile to bring to one of my local MQG meetings, where I'm known to bring a big pile of fabrics and scraps up for grabs.

A glimpse inside my scrap boxes - a stack of fat quarters sits on the left and a pile of scraps on the right

To read more about my sewing machine table, I've got a two whole posts right here and here dedicated to that. Here's hoping I can actually make it into my sewing room for some sewing this week, I can't believe it's Wednesday already!! Have a great day :)
Wednesday, February 12, 2014

The Lucky Stars Medallion Pillow

I'm so pleased to share that I packed up my box for the SewSew Modern swap just in time for the deadline earlier this week, and I'm really excited to hear from my partner soon when she receives it. It was hard to pack up the pillow cover I made for her, but really, with a swap, that's a job well done, I think.

SewSew Modern 4 - my pillow cover for my partner

I made a large pillow cover for my partner, using two Lucky Stars patterns from the 2013 series, the practice block and the December block. I resized both of them to suit my design, and got to stitching, creating a medallion design using lots of low volume prints as well as some bold fuchsia, teal, and gold prints.

The threads for my SewSew Modern pillow

When it came to quilting, I really wanted to try to match threads where I could, so I used a soft yellow in the star points for the center block, Aurifil #2105, then for the low volume areas, I used my trusty white, Aurifil #2024, and in the stripy border areas I used a really light gray, Aurifil # 2165. For the teal sections of the center star, I used Aurifil #1148 and for the aqua sections, I used Aurifil #2830, one of my current favorite shades of thread.

FMQ'ing away!

I added a simple envelope style back to the pillow - I'm a fan of the envelope for a couple of reasons. If you have a super poofy pillow, it allows a little bit of give to the fit, and on the other hand if your pillow is a little deflated, you can tighten the fit a little bit with an envelope back. I hope my partner will be happy with it! I've been wanting to try using the Lucky Stars blocks in a different kind of way, so I'm glad I did that with this pillow. I love how versatile those blocks can be and how many different ways they can be used.

FMQ Close Up 1 - Pulleys in the yellow star points, tight stipple in the low volume

I also added in to my partner's box a cool journal with a quote from Jimi Hendrix and a few sweet treats as well. Here's hoping she gets it today! That's absolutely the best part of swapping - that first contact you get from your secret partner after they receive what you made for them. Totally makes the swapping process worthwhile, in my opinion. :) Have a great Wednesday everyone!

Folded and ready to wrap - my SewSew Modern package

Pillow Stats
size - 23" square
fabrics - a bunch of fuchsia, teal, aqua, yellow, gold, and low volume prints including but not limited to Oval Elements in fuchsia and aqua, assorted prints from Zen Chic's Comma collection, Lucky Penny by Alison Glass Bike Path in fuchsia, Sun Prints by Alison Glass Corsage in teal, and more
quilting - Tight stipple in the low volume areas in Aurifil #2165, outline quilting in center star in Aurifil #1148 and #2830, pulleys in the yellow star points in Aurifil #2105, and mod clamshell (tutorial here) in the stripy borders with Aurifil #2165 - all in the 50 wt variety
pattern - adapted two 2013 Lucky Stars BOM blocks to suit what I wanted to do and made it work

FMQ Close Up 2 - Mod clamshells in the stripy border
Monday, February 10, 2014

A glimpse into my Type A mind and sewing studio...

So, if you've been reading my posts for a while, you probably already know that I tend to be a bit of a Type A personality. I like organization and tidiness and all that jazz, and that often conflicts with the creative side of me that can make a mess in two seconds flat all in the name of creating. There's often a good bit of mental struggle for me, trying to allow myself "room" to create without driving the put-it-away-if-you're-not-using-it side of me. Since the new year, I've been trying to tackle getting my sewing studio back in ship shape, ever so slowly, and going through everything in the room, from files to papers to books to batting scraps to fabric I have no earthly recollection of buying, all in the name of creating some order in my sewing studio. I even built myself a new storage unit for my closet area to make accessing my scrap bins easier!

My sewing worktable

Some important necessities next to my machine - my handy dandy scissors, my awesome pincushion from Cindy/Live a Colorful Life and my super cool coaster for my coffee from Amy/Don't You Know Who I Am

My mom called my dad the "mad mover" when I was a kid - he had a knack for wanting organization and tidiness, to the point where he would often pick something up that was out of place, only to get distracted in the putting-it-away and leave it somewhere altogether unusual. I clearly got the mad mover gene, because I found all kinds of crazy things in crazy places during this little overhaul of mine.

My bulletin board, full of inspiration from the quilting world and from my world as a mom, plus two of my favorite minis - one from Ginny/Fishcreek Studio (top) and one of mine (bottom)

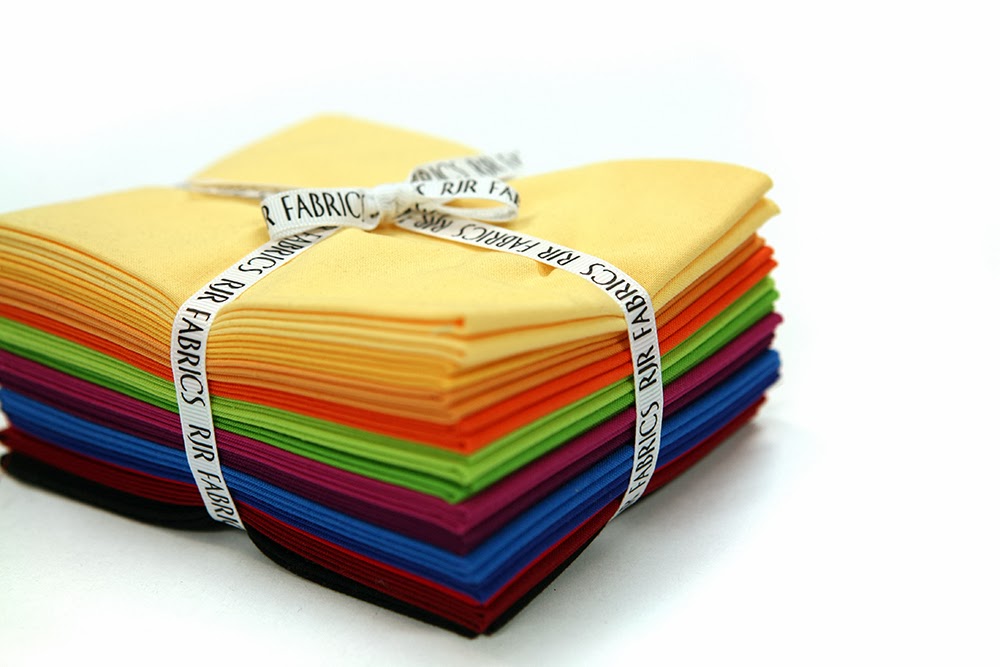
I've got my fabric shelves all tidy again, all organized by color, which makes me ever so happy. I even pulled a boatload of fabric to work on destashing later this month, so stay tuned for news about that. In the past, I've destashed via Instagram, and will probably choose to go that route again, as it's quick and easy.

The yardage in my stash - everything larger than a half-yard - lives on these shelves


I stow my half-yards and larger cuts on comic book backing boards that I get either from my local comic book store or from Amazon, and secure them with small tipped pins, which creates the feeling that I've got my very own fabric store to shop from when I start a new project. I keep my fabrics in rainbow order, with a small collection of multicolored fabrics at the end of the rainbow (after black).

My low volume half-yards, one of my favorite shelves

The multicolored half-yards

My blacks - accompanied by a paper weight one of my favorite bosses ever gave me

I've also got a shelf for my atypical fabrics - my linens and flannels and such, as well as a pile of voile, which I never put on the boards (too slippery) and some small pieces of my favorite fabric collection ever, Wonderland, from when I first started sewing.

My other types of fabrications - linens, flannels, etc

My precuts used to live on one shelf, all shoved together, in like sardines, but I split them up into two shelves and it's much prettier this way. I've got an award I won back in my corporate job days as well as one of my favorite gifts ever, a Cheshire cat from my assistant during my corporate job days, with the precuts. I'm not usually one to collect a lot of knick-knacks, but those things make me smile, so they get to stay in my sewing studio.

My precuts

For my scraps and fat quarters, I keep them in bins, which I've moved to my sewing studio's closet, in an effort to keep the floor a little bit emptier. I have a bin for every color, with the color name on the side, as well as an unsorted bin, for those scraps that I haven't put away just yet. I used to keep the bins stacked up high, which made accessing my scraps a bit frustrating - unstacking and restocking and all that - so this new cube shelving system allows each bin to sit independent of the others, so I can get to just one at any given point in time, which is going to make scrap busting much, much easier!

The view of my closet from my sewing chair

A glimpse inside my scrap boxes - a stack of fat quarters sits on the left and a pile of scraps on the right

My newly built (by me!) cube bookcase for my scrap bins and my Featherweight in my sewing closet

Nice labeled containers in my sewing closet - yay! It's so nice to know where everything is...for now!

My sewing closet

Also in my sewing studio closet, I've got several large tubs - one for my selvages, one for my strings, and two for my large cuts of yardage for backings. I also keep my travel case for my machine in the closet, and it stows my Featherweight. In the corner of the closet, I keep a roll of batting. I go through a quite a bit of it on a regular basis, so buying by the roll makes good sense for me.

My selvages!

Back on the shelves in my sewing studio, I keep my mammoth stash of 505 basting spray as well as my Best Press. I've got some of the new Flatter spray on its way to me right now, too, and I'm excited to try it out. I'm also repurposing some nifty Lego containers from the Lego Store to hold my Aurifloss and Cosmo floss. They look awfully pretty in those containers, and I love getting to reuse them!

My Aurifloss and Cosmo floss

My design wall sits perpendicular to my stash, right behind my sewing worktable

So, that's my sewing studio setup for the moment. It's totally subject to change, but I'm feeling good about all the purging I did in my drawers and my closet, and how tidy things are. For more details on the initial setup of the room, including the furniture and sewing worktable, click
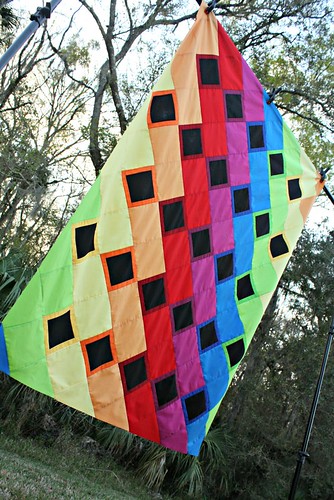
 here and here. Now, I can make a mess with the best of them, but at the end of the day, I always try and at least tidy up because when I can't find things to create with, it's awfully hard for me to create. Speaking of creating, next up for me is a pair of Super Totes! Hope you enjoyed the tour today! Have a wonderful Monday :)

My current pile on my cutting table - a pair of Super Totes in progress!
Friday, February 7, 2014

Some fun teaching coming up!

I'm really loving all the teaching I've been doing this year. It's so fun to get to meet other quilters and work with them to build their skills and quilty confidence! I've got a few events scheduled over the next week or so that I wanted to share about, as they're at the newest Juki dealer in my area, Happy Apple Quilts in Palm Harbor, FL. I was so excited when I walked into the shop, only to be greeted by my dream long arm, a Juki Quilt Virtuoso Pro, as well as the younger sibling to my TL98, the TL2010. Felt like home :) I'm happy to share that I've got three events over the next week and a half out there - starting next Saturday, February 15th. I've got a trunk show at 10:30 am on Saturday the 15th. Trunk shows are so fun to do - and I always make sure to bring loads of different quilts from my lifetime as a quilter, including my very first quilt!

Trunk Show @ Sarasota MQG

Also on Saturday, I'm teaching a HST Boot Camp, where I'll show three different ways of making half-square triangles, as well as several ways to put them together into fun blocks.

                   Lattice of Stars - from Becoming a Confident Quilter   Sparkling Diamonds quilt - FMQ detail 2-1

Then, on Tuesday the 18th, I'm teaching my Showstopper foundation paper pieced block in a workshop format, which is going to be super fun, but it is currently sold out. I'm really looking forward to this one - I love teaching foundation paper piecing and making it make sense to someone who's felt frustrated by it! There's nothing like having a person in front of you showing you how to do something. That's why I love to teach at local quilt shops!

Showstopper - side view

There's a few spots left for the trunk show and the HST Boot Camp workshop, so call the shop today to reserve your spot if you're in the area! You can reach them at 727-786-0080, and I hope to see some familiar faces there! Have a wonderful weekend everyone :)
Wednesday, February 5, 2014

A tale of a pillow cover: part one

Once upon a time, there was a super fun swap called Sew Sew Modern. I watched from the sidelines for the first two rounds, and jumped in on the third round, and had a lot of fun. I made something I really loved, received something fantastic that I adore, and promptly signed up for the fourth round when sign-ups opened. Then, I got crazy busy, and lost track of the swap deadline. Fast forward to last week, and I realized I need to get the lead out and get my items made for my partner!

SewSew Modern - getting started

The good news is that my secret partner has very specific taste, so it was easy to think up something that I think she'll enjoy. For once, I feel pretty confident that she's going to like what I'm making, which is a refreshingly wonderful feeling in a swap! The next-best news is that I'm having fun making her items so far, and moving right along and should finish just in the nick of time.

SewSew Modern sip

So far, I'm working on a pillow top with a medallion design, using some Lucky Stars blocks from 2013 (the bonus block and the December block), in miniature form, in a color palette completely and utterly inspired by the movie Frozen. Ha! My sewing time has been limited to the darkness lately, so I've mostly shared the progress of this pillow top on Instagram so far, but I managed to get a few decent pictures in the daylight yesterday in between the mountains of work I've got this week.

SewSew Modern project in progress

This is going to be a hard pillow cover to give away, but I always love that feeling of giving away something that you truly love and are proud of having made, so I suppose that means that this is going to be another successful round of Sew Sew Modern for me. Next up is another border and then some quilting, and then a simple back, so I'm in the home stretch, I think! Stay tuned for a finish on this one real soon, I hope. Have a wonderful Wednesday!
Monday, February 3, 2014

Making friends with purple

Purple is a color that's sorely lacking in my stash - and with the naming of Radiant Orchid as the Pantone color of the year, I'm slowly trying to build up my purples, and use them. My purple stash is awfully malnourished compared to, for example, my greens or blues, which I should officially put a moratorium on buying!

Purple is just a blip in my stash...

Purple's never been my favorite color in the world, so it's not surprising that I don't have much of it in my stash...but if you're an avid fabric shopper like me, you're probably aware that purple hasn't been a super popular color in modern fabric collections in recent years. Seemingly, purple doesn't sit at the cool kids table in the color cafeteria, but maybe with Pantone choosing a shade of purple for the color of the year, that may change. Personally, I love a well-rounded rainbow in my stash, so I'm open to trying to make friends with purple, so the last month or so I've tried to add some new purples to the stash.

Some new purples to be shelved in the stash

I found these purple lovelies at Hawthorne Threads recently, and when I opened them this weekend, they made me think maybe purple's not so bad. I actually felt awfully inspired to put them into a project, so I might try to work them into my second Sew Sew Modern project, which is next up to get started on, pronto, since the mailing deadline is fast approaching. I made a good bit of headway on the first project this weekend and hope to wrap it up this week.

SewSew Modern progress - a little 4" Lucky Star

If you're trying to make friends with purple and need some motivation, check out the cool Radiant Orchid challenge hosted by my friend Anne of the fab Play Crafts blog and Adrianne of the On the Windy Side blog right here. There's even a whole section at Intrepid Thread dedicated to fabrics in the color of the year to help you get started, if you too need to make friends with purple. There's definitely quite a few nice purples out there these days! You can also find some great purples at I Don't Do Dishes, Pink Castle Fabrics, and Stash Modern Fabrics, too.

Some favorite purples in the stash...

What about you? Are you a purple fan? Have a great day today!

Welcome! I'm Elizabeth, mom to a mood teen boy and a chatty six-year-old girl and I sew for my sanity. Let's get to quilting, shall we?
The Epic Sampler BOM Club kicks off Oct 1st
Copyright 2010 by Elizabeth Dackson. Powered by Blogger.

Search This Blog

Archive

Tutorials

 photo Icicle-Star_zps7f032133.gif  photo Boxed-In2_zps800ae9da.gif EasyPeasyFauxZigZag StringHeartBlock StarCrossed CrossMAze CathedralStar RainbowRing DoubleFlip PatchworkWheel FriendshipOctogon FlyingGeese HST Weathervane MarinersStar StackedScrappyBlock ScrappyAngles HolidayPresentBlock DivideandConquer CharlestonFarmhouse ModernHalves ModCircuitry ModNine Kaleido SlicedCoins Kaleido BellaCrossing SweetGirlie MiniBookshelf ClamshellLoop DoubleHourglass BaptistFan TetrisMug StringDiamond ScraptasticTote OffsetDiamonds MunchkinSoftBook PatchworkBathMat