Showing posts with label free motion quilting. Show all posts
Thursday, June 5, 2014

How do you audition your quilting stitches?

I'm guest posting again today over at Sew Mama Sew, sharing my top three methods for testing out quilting stitches without sewing a single stitch. I don't know about you, but I positively detest having to rip out quilting stitches. I think most of us prefer to avoid the seam ripper when possible! So I really like getting an idea of what my stitches might look like before stitching them, thus preventing as much ripping as possible. Check out my post right here :)


Speaking of quilting, if you are looking for some new quilting stitches to master this summer, you might want to pop over to Craftsy over the next few days, as they're having a giant summer sale, with big deals on all their classes, including Angela Walters's latest class, Little Changes Big Variety. Have a great day!
Wednesday, May 7, 2014

Guest posting at Sew Mama Sew today!

I'm super excited to tell you that I'm going to sharing over the next few months at Sew Mama Sew - it was one of the first blogs I ever guest posted on several years ago, and I love how much information they've cultivated there over the years! I'm posting the first in a series of posts about free-motion quilting over there today, Top 10 Tips for Beginning Free-Motion Quilters. If free-motion quilting has gotten the best of you in the past or if it's been something you've been hesitant to try, check out my tips for getting started on the right foot, and remember that your attitude will make or break your early experiences with free-motion quilting.


When I first started free-motion quilting, I didn't know I was supposed to be scared of it, so I just went for it and did it. It wasn't perfect, and I knew it, but I didn't let that get to me. I focused on having fun with it, and over time, with lots of practice, my stitches got better and better. And yours can too!


You can check out my top tips right here, and if you want more free-motion tips, tricks, and examples, check out my Craftsy class and save $15 on your class registration right here - Start Free-Motion Quilting! If you're more of a fan of walking foot quilting, you can also check out Jacquie Gering's new Craftsy class, Creative Quilting with Your Walking Foot, which is just fantastic. Have a super day!
Thursday, April 10, 2014

The lowdown on FMQ feet

I'm guest-posting over at Sew Mama Sew today, talking about free-motion quilting feet for domestic sewing machines. Much like with piecing feet, there are lots of options for free-motion quilting feet! Open toe, closed toe, floating, spring loaded - it's a smorgasbord of options, really. I'm breaking them all down to give you the lowdown about what feet work best for free-motion quilting, and there is a super fun giveaway involved too! Hop on over to Sew Mama Sew to check it out!


Wednesday, March 26, 2014

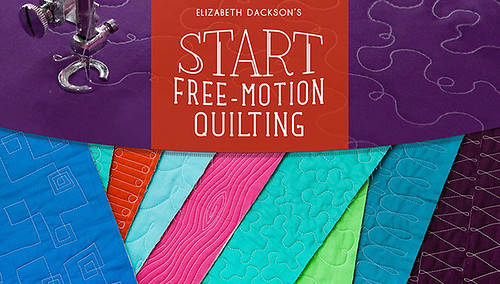
Start Free-Motion Quilting - My Craftsy Class!!

Start Free-Motion Quilting

The day is finally here - my Craftsy class is officially up and running! Start Free-Motion Quilting is my first class with the wonderful folks at Craftsy, and this class is perfect for you if you're just getting started with free-motion quilting, or if you've done it before and run into trouble, or if you've done it before and just haven't fallen in love with it. Trust me, my love for free-motion quilting is contagious!

Start Free-Motion Quilting with me on Craftsy!

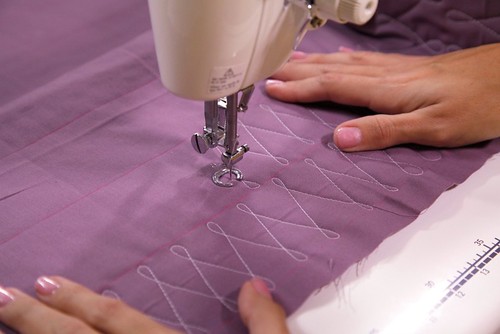
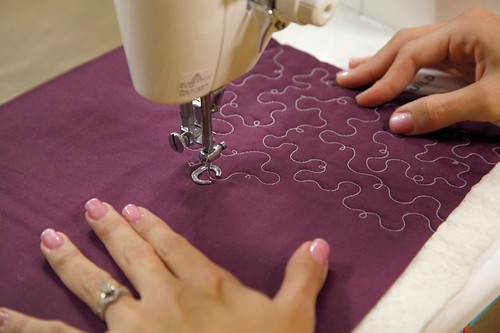
In my class, you'll not only learn about the necessary tools of free motion quilting, but you'll also learn how to handle many of the common problems that can happen when you free motion quilt, from skipped stitched to crazy stitch lengths. I also walk you through ten different free motion quilting stitches that I come back to again and again, that can be used in many different ways, and all of which are super beginner friendly.

More from Start Free-Motion Quilting!

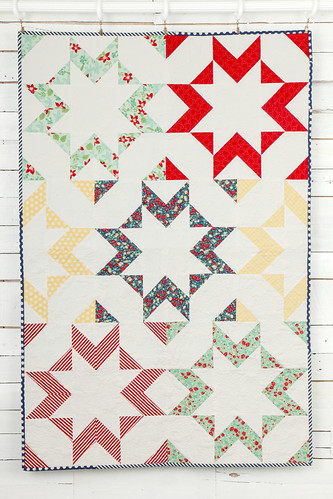
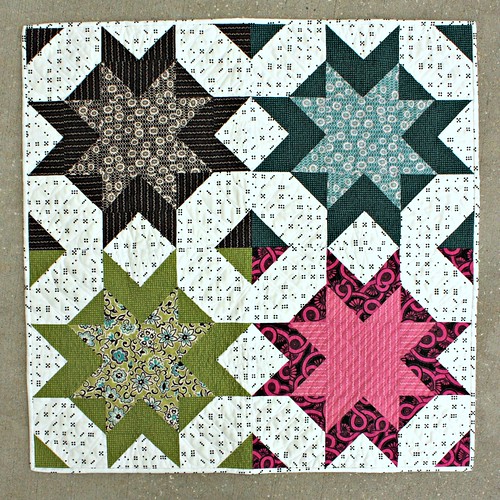
There are also three patterns included with the class, two pillow patterns and a baby quilt. You'll also find a great Getting Started checklist and a Troubleshooting Checklist in the class materials, to keep near your machine to help you as you're getting started free-motion quilting. Today, I want to share with you about the baby quilt pattern found in the class materials, the Superstar quilt. For the class, I sewed up a Superstar quilt in Bonnie & Camille's April Showers prints. Super light and fun, perfect for a new baby.

Superstar - The Original Version

Very sweet, right? Having played digitally with fabric choices on this pattern before making it, I knew Superstar could have an edgier, funkier look to it, so I also sewed up another one over the past week or so, using Denyse Schmidt's Ansonia and Violet Craft's Waterfront Park. Talk about a perfect match! While I love both versions of this quilt, I will definitely be looking for a great place to hang up my Denyse/Violet mash-up Superstar quilt, the colors are just totally me :) 


Superstar - The Edgy Version

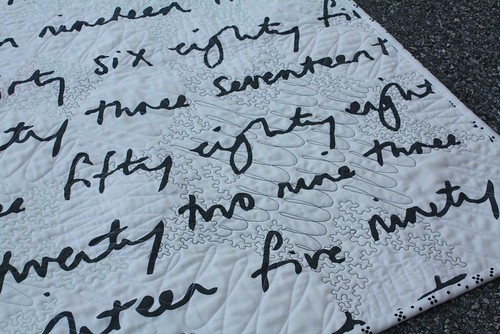
Superstar - The Edgy Version - backing

Have you taken a Craftsy class before? I'm big on learning new things, so I love Craftsy. I love being able to learn about what I want to learn about, when I have time to learn it. And oh my goodness, they've got a class for everything! I just love the wide variety of classes on Craftsy, from creative photography to croissant making, from chocolate cakes to improv piecing, from dressmaking to cake decorating, they've really got it all. And now they've got me, too, and I'm so very excited to be working with them. It was a blast to put this class together and I cannot wait to hear what you think of it! To save on your Start Free Motion Quilting class registration, click here and you can start watching right away! 
Wednesday, March 12, 2014

Just a little FMQ action...

It's been such a fun couple of days in my sewing room, because I've suddenly found myself with an abundance of quilt tops to finish, so that means a whole lotta FMQ going on! I'm not entirely sure how that happened, but it's been one of those happy accidents. I remember at one point when I was working on my book that I consciously decided to save up the quilt tops and quilt them all successively, because the free-motion quilting was my favorite part of the quilting process, and I wanted to get to do a ton of it at once. This time, I didn't really choose to do that, not consciously at least!

The line-up - Aurifil (all 50 wts) from L-R -  navy (#2735), orange (#2214), green (#5017), fuchsia (#2588), yellow (#2105), and red (#2250)

Free-motion quilting is still one of my favorite parts of the quilting process. I love the freedom I feel just stitching away, freehanding different shapes and designs in thread. While I'm a perfectionist about a lot of things, somehow I am able to check my perfectionist tendencies at the door when I'm free motioning and I just enjoy the process.

Rainbow Dance Party - quilting sneak peek

One of the other things that I love about free-motioning all of my own quilts on my home machine is working in sync with my Juki. I'm not kidding when I tell you how much I adore this machine. It may be nearly frill-less, with little to no bells or whistles, but let me tell you, this Juki knows how to get the job done. And ultimately, isn't that what we want from our sewing machines? It's such a joyful experience to get in a good groove with the Juki and just stitch away, with some good tunes and some fab thread, my favorite - Aurifil.

Sometimes the back is almost prettier than the front

I'm excited to tell you that I have some pretty big news that I'll get to share coming up later this month that has to do with free-motion quilting...and it might just rhyme with daftsy, if that were an actual word..so make sure to stay tuned for more on that!

Some spring flowers

Question for you...do you free motion your quilts on your home machine? Let's do a little giveaway today - you tell me about your experience with free-motioning, love it or hate it, and I'll choose a random winner to win a nice, fat spool of my favorite thread from my personal stash, Aurifil 50 wt in one of my favorite  shade of white, trusty color #2024. Ready, set, go!

a Rafflecopter giveaway
Scale can totally change the look of a stitch - the micro mod clamshell
Monday, January 6, 2014

Whole lotta free motion going on!

If only my sewing machine had an odometer...I bet it would show some serious mileage from the last several days of nonstop sewing! Sewing machines really should have odometers, don't you think? It would be awfully fun to know how many miles you'd sewed, right?

Mod Clamshells in a staggered setting
Mod Clamshells in a staggered setting - tutorial right here!

In any case, I've been doing tons of free motioning the last few days. Miles and miles of it, actually. It's been a lot of fun to just stitch and stitch away, with some good tunes and tons of trusty Aurifil! I'd forgotten how relaxing free motioning can be with the right playlist! Do you like to listen to music when you free-motion? Or are you a fan of audiobooks or movies while you stitch?

A little flowery FMQ action

Speaking of free-motioning, I've added a bunch of new dates and times to my Class Schedule page, including more free motion classes, by popular demand. FMQ is such a fun thing for me to teach, I'm really excited to continue offering those classes. I've got quite a bit of classes and trunk shows coming up in 2014, including paper piecing and quilt workshops. It's going to be a ton of fun! Won't you come join me? :) Have a great day today!

Stacked wishbones
Friday, March 15, 2013

FMQ Troubleshooting Tips & Tricks

I've spent the last few weeks dealing with FMQ headaches, as I get to know my Juki better. I've been teaching free-motion quilting now for several months, and have dealt with FMQ troubleshooting on lots of different brands, but this was my first Juki, so it's been a little bit of a challenge. Admittedly, my Viking Sapphire was extremely easy to free-motion on - turn it on, put the proper foot on and go, basically, but the Juki has taken a bit more tweaking. One of the things I hear most often in my free motion quilting classes is that the most challenging parts of FMQ is troubleshooting tension problems, so I wanted to share with you some of my tips and tricks to help you find the right settings on your machine for FMQ...

Cathedral Windows FMQ

Free Motion Quilting Troubleshooting Tips & Tricks
So you're free-motioning, and things are going well at first...until blam - a skipped stitch! Or blam - thread breakage! What do you do? Follow these tips and tricks below and I feel sure you will find the answer to your problem.

1. Change your needle. If it's been on there a while, it may be worn out. More often than not, a new needle will fix things up for you. Free-motion quilting puts a lot of stress on your needle, and it's more prone to bend or warp during free-motion quilting than when piecing. I try my best to remember to start each free motion project with a fresh needle.

2. Cut both your bobbin and top threads and rethread both. Dig out your manual for this one, and follow the directions step by step. One of my FMQ students had been using her machine for over ten years, and threading it improperly all along!

Wiggle FMQ


3. Clean out your machine. Take out your bobbin and clean the bobbin case throroughly. Keep your eyes peeled for stray threads, too. Use a tweezer to grab any stray threads you find.

4. Try a bigger needle - your needle may be too small for this. Ultimately, this has been the biggest solution with my Juki. I'm now using a Topstitch 100/16 Needle for FMQ on the Juki, which seems to work best. It has a much larger eye than the 90/20 needle that I use on my Sapphire for FMQ, so experiment with your machine to find what works best. Bigger needles, in general, are more rigid and will resist bending, even when FMQ'ing, and the needle bending is what most often causes skipped stitches and broken threads.

Sharp vs Topstich Needle


5. Can you adjust the pressure of the presser foot? It may be too strong/high. On the Juki, my presser foot pressure guide looks about like so...

6. Give it some gas. If your motor (and therefore your needle) is moving too slowly, it can create additional pressure on the needle, often causing thread breakage or skipped stitches. Try to keep your speed nice and even, at a medium to fast pace, to keep your stitches even and your needle nice and sturdy.

7. What kind of thread are you using? Some machines just don't like certain brands of thread. I've found so far that my Sapphire despises Superior threads and the Juki doesn't like Coats & Clark threads. Each machine is different, so try other brands. The one thread brand that I can't recall hearing anyone say their machine doesn't like is Aurifil, so you may want to give that a try.

Mixed FMQ


8. Set your stitch length to zero. Many machines don't need this in order to FMQ properly, but if you're still having trouble after all of the other steps, give this a try.

9. Make sure your needle and foot are installed properly. Double-check that your needle is fully screwed in and that your free motion foot of choice is installed accurately. I once had a student using a spring-loaded open toe foot who had stitch problems until we realized that the needle rest was not sitting on the needle screw as it should be. Once we reinstalled the foot properly, all was well!

10. Try lowering your top thread tension. Is your top thread breaking? If you've already followed the steps above, it's possible your thread tension may be too tight. Try lowering the tension.

If all else fails, take your machine in to a dealer for a full cleaning - it's possible that your machine may need to have the timing adjusted if all of these tips have failed you. Make sure to tell your dealer what's going wrong and what you've done to try to solve the problem.

By the way, if you're in the Tampa area, I'll actually be teaching my Beginning Free Motion Quilting class at Inspire Quilting & Sewing next Friday, and there are still a few seats available, so if you're new to free motioning or feel like you need help, I'd love to see you there! Have a great weekend :)
Friday, February 1, 2013

Friday Fun: The Clamshell Loop Tutorial

Happy Friday! One of my goals this year is to try to share more tutorials with you guys - it's the least I can do to thank you for all of your support here on my blog. Today's tutorial is a free motion quilting one - I love free-motioning, and I absolutely love teaching it to others as well. This FMQ stitch is a simple continuous line design I'm calling the Clamshell Loop. It's an easy and pretty fun to boot.

Clamshell Loop FMQ on solid

This is a linear design, so you'll either need to mark your quilt top for this design, or FMQ this design on a quilt with lots of patchwork that you can use as your lines. For the photos in this tutorial, I created a small quilt sandwich, and drew lines with a ruler and a Frixion pen. Frixion pens are handy for marking because they disappear when heat is applied, like from an iron.

Before I try any new FMQ style, I always doodle it a few times with a Sharpie to get the hang of the motion of the stitch. A quick warning: I doodle the opposite direction the I stitch in. I doodle from left to right, just the same way that I write. But I quilt from right to left, so just keep that in mind when following this tutorial. To doodle this design, simply follow the arrows on the diagram below.

IMG_2840rt

Now, when I sit at my sewing machine to FMQ, I make sure to begin by placing my needle in what will become the binding area, and stitch a few stitches in place, to create a knot, then begin to stitch in an arc to the left, as shown below.

IMG_2841

IMG_2850

I sew the first arc, moving from right to left, and creating a loop that moves counter-clockwise, leading into the next connected arc, and so forth. I then continue into the third clamshell, the fourth, and so on, until I finish a row.

IMG_2844

Then, I begin all over again, moving my quilt sandwich so that I'm back on the right edge of the quilt again, and stitch another row. This stitch gives lots of great texture to a finished quilt, even when you look at it through a print, rather than a solid fabric.

IMG_2847

You can experiment with the width of your clamshells, with the size of your loops, and create a lot of different looks with this one stitch. I hope you enjoyed this tutorial! If you follow this tutorial, I'd love to see your progress in my Flickr group, Stitching with Don't Call Me Betsy.

Clamshell Loop FMQ on solid

Clamshell Loop FMQ on a print

I recently used this FMQ style for a project that's headed to QuiltCon, but I can't show you much more than this just yet. Very soon, I promise!

Can't show you more yet, but I promise it's pretty!

Let me make it up to you - the fantastic Julie of Intrepid Thread is giving away a super fun fat quarter bundle that I've put together, which would be so amazing in my new Wheel of Fortune pattern - this bundle is called Orange You Glad It's Friday. To enter, simply tell me about your favorite FMQ stitch. Never tried FMQ before? Tell me which FMQ stitch or style you'd love to master. This giveaway ends Sunday 2/3 at midnight EST. A winner will be announced on Monday. Have a great weekend! THIS GIVEAWAY IS NOW CLOSED.

Friday Fun Giveaway thanks to Intrepid Thread
Thursday, August 9, 2012

Scrappy goodness always makes me smile

Thanks everybody, for all the wonderful ideas and feedback about my desk troubles. My husband has constructed an extra support under the desk that seems to be helping quite a bit, so I think things are on the upswing on that front. I'll try to get a decent picture of the way things are now real soon. I've been sewing the last couple of days, trying to get caught up on a few projects that have snuck up on me, and I've actually got some things I can share for once, yay!!

I finished up this gorgeous block for Brioni, using this tutorial. I highly recommend it. Such a pretty finished block! I can't wait to see her start to put all of her blocks together, they're going to be so super pretty. I just love scrappy blocks like this!

Lone Starburst for Brioni

I also finished up quilting a quilt I can't share just yet, but I'm really happy with how the quilting turned out, and I can definitely show you that part! It was a lot of fun to work on, and it was a big relief to see that my new set-up really did make the quilting go much more smoothly, thanks to the large work surface.

Quilting - check!

It feels good to be spending some time with my sewing machine in between getting ready for school to get started up again. It's been a great summer, but I'm ready to get back into the swing of school again!
Tuesday, March 13, 2012

Tutorial: FMQ Baptist Fans

I think these baptist fans are officially my new favorite style of free motion quilting.  I'm hoping that with a bit more practice, I might just be able to freehand these fans without marking up the quilt, but we'll see.  I've heard from a lot of you guys over the last few days about these fans, and how they look hard, and I can tell you this much: you can do this.  It may take a little bit of practice, but this style of FMQ is totally doable.

Star Crossed Stitch quilt - unwashed detail #1


You'll need:
Circle Cut ruler, or similar
Water-soluble fabric marker
FMQ foot of your choice - I use a spring-loaded open toe foot
FMQ thread of choice - I use Gutermann or Aurifil, but whatever your machine likes will work just fine

A few notes about this tutorial:
* I am right handed, but I stitch right to left in this tutorial and 99.9999% of the time.  Why?  Because it makes sense with the way my machine is set up.  Feel free to flip the ruler upside down and trace your fans in the opposite direction so you can stitch right to left, if you prefer quilting that way.
* This design can also be done with a walking foot, but honestly, I really intensely dislike straight line quilting (and to me, all quilting with my walking foot is like straight line quilting), so I much prefer this method.  I feel it's way more enjoyable, but to each their own.

Let's FMQ!
1. Before basting, take your finished and pressed quilt top to your cutting table or another large surface.  It's best to do your marking on an unbasted quilt, in case the marker bleeds through to your batting.  It's also a lot easier to work with, without the extra heft of the batting and backing.  Note below that I have modified my circle ruler slightly; I have added a piece of masking tape at an approximately 45 degree angle, so that I don't overtrace my fans. 

IMG_8115

2. Align your Circle Cut ruler with the bottom of your fabric, with the outside edge of your outermost circle line close to the edge of your fabric.  It doesn't have to be at the edge, just close.  Begin tracing the lines, stopping at the tape.

IMG_8117

3. Repeat step 2 over and over until you have completed your first row of fans, scooting your ruler to the left and starting each new fan with the outermost arc butting up to the edges of your previous fan.

4. To start a new row of fans and create some additional visual interest, you'll want to nest your fans.  To do this, set your ruler with the arrows in the center lining up with where your fans below meet as shown below.  

IMG_8123

5. Continue tracing fans and creating new rows until you have covered the quilt top.  

IMG_8124

6. Baste quilt as desired.  Next, load up a fresh bobbin, your FMQ foot of choice, and get ready to quilt.  Begin by putting your needle down at the start of your fans in the bottom right hand corner of your quilt.  If your machine has a needle down feature (where whenever you stop the machine, the needle is down), be sure to turn it on.  We're going to be moving the quilt to create the curves in these fans, but in a linear fashion.  There will be no rotating of the quilt as this design is quilted.

IMG_8129

7. Stitch-trace the outermost curve of your fan, moving from right to left, until you reach the end of your first curve.  Stop, with the needle down.  As you're stitching your first curve, the one after that, and the zillions after that, here's a tip: Don't freak out if your needle bobbles or wobbles a little bit as you're stitch-tracing.  Just keep flowing with it, don't try to correct it immediately, you can gradually work your way back to the blue line.  Once you rinse the blue lines from your quilt, you'll never see the wobbles again.  I promise.  :)

IMG_8133

8.  To begin stitching the next curve, slowly stitch downward from your top curve down to the next curve, as shown below.  Then begin stitching to the right, again tracing the curve.

IMG_8137


IMG_8139

9. Continue stitching back toward where you began your fan, creating the second curve of the fan, and stop, needle down, at the end of the traced line.  Next, stitch to the left, to catch the next traced line.  

IMG_8148

10. Repeat to stitch all traced lines from your Circle Cut ruler.  You'll notice, however, that when you stitch the final traced curve, that you have stitched to the left of the stems of your fan curves.  You will need to freehand stitch the final curve of your fan, moving back to the right, to match your other curves.

IMG_8153

11. To travel to your next fan from your final freehand curve, stitch to the left, to the edge of the outermost curve of the next fan as shown below.  The arrows show you here which direction to move your quilt as you stitch.

IMG_8157

12. Repeat, stitching over each traced line, until all lines are stitched.  Then, using a spray bottle loaded with water, rinse away those blue lines, and ta da!

IMG_8158

IMG_8169

Now, if my husband ever stops working 18 hour days, I will try to post a video of me doing this kind of FMQ, to help make it a wee bit clearer.  If you have any questions, don't hesitate to let me know!  And if you use my tutorial to add some fans to your quilt, please be sure to shoot me an email, I'd love to hear all about it!  You can also add photos of your work following this tutorial to my Flickr group.   Have a great day!

Welcome! I'm Elizabeth, mom to a mood teen boy and a chatty six-year-old girl and I sew for my sanity. Let's get to quilting, shall we?
The Epic Sampler BOM Club kicks off Oct 1st
Copyright 2010 by Elizabeth Dackson. Powered by Blogger.

Search This Blog

Tutorials

 photo Icicle-Star_zps7f032133.gif  photo Boxed-In2_zps800ae9da.gif EasyPeasyFauxZigZag StringHeartBlock StarCrossed CrossMAze CathedralStar RainbowRing DoubleFlip PatchworkWheel FriendshipOctogon FlyingGeese HST Weathervane MarinersStar StackedScrappyBlock ScrappyAngles HolidayPresentBlock DivideandConquer CharlestonFarmhouse ModernHalves ModCircuitry ModNine Kaleido SlicedCoins Kaleido BellaCrossing SweetGirlie MiniBookshelf ClamshellLoop DoubleHourglass BaptistFan TetrisMug StringDiamond ScraptasticTote OffsetDiamonds MunchkinSoftBook PatchworkBathMat