Showing posts with label sewing room. Show all posts
Monday, April 13, 2015

A tour of the new sewing studio!

Now that most of the boxes are unpacked and most everything around the house has found a home, I've spent some time really getting my sewing studio set up. It was up and running to finish up deadlines as soon as we moved in, but it was chaos. Piles of boxes, stuff all over the place, and nothing in its rightful place. I know lots of quilters thrive on creative messes but I'm the polar opposite. Maybe I'm in the minority among creative types, but when everything around me is chaotic, it's really hard for me to be creative. Getting everything all sorted and organized feels like a weight off me. I actually even went into the studio this weekend and did a little sewing, just for fun, using a couple of layer cakes of Cotton + Steel and some super simple patchwork. It felt fantastic!! Without any further ado, here's a quick tour of my new sewing studio!


In this move, I decided to retire my dad's old desk, which was my first sewing table when I started sewing, and in more recent years has been my cutting table. It's in sad condition after all these years, but I did keep it and move it into the office for my son to use as a desk space. I picked up a new wooden table top from Ikea and had a handyman build some legs to match my sewing table, so now I have a nice, giant workspace. It's great for cutting, and even better when I'm quilting. One thing I love about my new space is the ceiling height. I've got so much more room for hanging minis now! I seem to have a fairly large collection of them and am working on hanging many of them throughout the house, but I selected some favorites to hang in my sewing room.


I also got a new LED light kit from Amazon to add some additional light to my Juki, which is fantastic and was super easy. I definitely recommend it - and it will fit any sewing machine, too!


I also converted to a stand up design wall rather than the hanging kind that I previously had. This one is a good bit taller than my old one, and it was such a breeze to make - all you need is leftover packing tape, some batting and insulation boards. Easy peasy!


Another new addition is my pegboard, which is something I've always wanted in my sewing room! I painted it myself, albeit somewhat unevenly, but I love the color. It's also so nice to have a good place to store my rulers and cutters and things.


Going through my fabrics as I shelved them, I found a good number of things that I'll be destashing soon, so stay tuned for info on that. I'll likely do it through Instagram, but perhaps I'll post some items to my Pattern Shop as well for destashing.


The closet is quite possibly one of the best parts about the room. It goes under the stairs, so it's quite large, and actually fits all the things I want to fit in my closet, from my scraps to my patterns to my rolls of batting, and has room for more, so yay for that! It's also a great place to hide for hide and seek :)


And that's the studio in a nutshell - hope you enjoyed the quick tour! Happy sewing to you and happy Monday :)
Wednesday, February 19, 2014

Sewing Studio Q&A

I've gotten a lot of questions over the last week since I posted recent pictures of my sewing studio that I thought I'd answer in a blog post, in case you might be wondering the same thing as another fellow reader!

My design wall sits perpendicular to my stash, right behind my sewing worktable

Q - Where did you get those bookshelves for your fabric?
A - Those are Billy bookcases from Ikea, with the optional glass doors. I built the bookcases, but when it came time to add the doors, I got a little nervous about working with the glass, so my husband did that part. That being said, these are not the most sturdy bookcases in the world, but for the moment, they're the size I need and look I wanted, so they work for me.

Billy bookcases under construction

Q - How tall is your cutting table? Does it kill your back?
A - My sewing table and cutting table back up to one another to make an extra large flat surface for when I'm quilting, which I love. My sewing table was custom built for me, so the legs were made just the height I wanted them to be, but my cutting table is a regular desk, sitting up on big blocks of wood to make it about 36" tall, which is the right ergonomic height for me to be able to cut without bending over. It's roughly about kitchen counter height. It was one of the first things I wanted to change about my cutting table, as it's always been a regular desk, and it's one of my favorite things about my sewing room these days because I can cut and cut and cut without any back problems.

Wooden blocks to make my cutting table taller

Q - Can you tell a little more about the cube shelves in your closet? I've been trying to find a set of cubes to fit in my closet but the sizing is all wrong. What do you have and how big is it?
A - I'm a Target girl, and those cubes are straight from their organization section. They are the ClosetMaid Cubeicals 12-cube organizer, which measures right about 48" tall x 36" wide x 12" deep.

My newly built (by me!) cube bookcase for my scrap bins and my Featherweight in my sewing closet

Q - What size fabric do you consider to be a scrap for your scrap bins? Do you save all your scraps?
A - I used to be real finicky about this, but now my rule of thumb is pretty much fat quarter or smaller, it goes in the scrap bin. I destashed most of my fat quarters last year, as I kept getting frustrated that they weren't half-yards like the rest of the bulk of my stash, so I've relegated the small number of fat quarters I still have to the scrap bins. As for what scraps I choose to save and choose to toss, I try to think about usability and how likely I am to use it again. So, for instance, when I have weirdly shaped scraps from paper piecing, I take a look and think to myself, is this a fabric I really love and want to reuse, in spite of the strange shape/size? If so, I keep it. If not, I put it in a pile to bring to one of my local MQG meetings, where I'm known to bring a big pile of fabrics and scraps up for grabs.

A glimpse inside my scrap boxes - a stack of fat quarters sits on the left and a pile of scraps on the right

To read more about my sewing machine table, I've got a two whole posts right here and here dedicated to that. Here's hoping I can actually make it into my sewing room for some sewing this week, I can't believe it's Wednesday already!! Have a great day :)
Monday, February 10, 2014

A glimpse into my Type A mind and sewing studio...

So, if you've been reading my posts for a while, you probably already know that I tend to be a bit of a Type A personality. I like organization and tidiness and all that jazz, and that often conflicts with the creative side of me that can make a mess in two seconds flat all in the name of creating. There's often a good bit of mental struggle for me, trying to allow myself "room" to create without driving the put-it-away-if-you're-not-using-it side of me. Since the new year, I've been trying to tackle getting my sewing studio back in ship shape, ever so slowly, and going through everything in the room, from files to papers to books to batting scraps to fabric I have no earthly recollection of buying, all in the name of creating some order in my sewing studio. I even built myself a new storage unit for my closet area to make accessing my scrap bins easier!

My sewing worktable

Some important necessities next to my machine - my handy dandy scissors, my awesome pincushion from Cindy/Live a Colorful Life and my super cool coaster for my coffee from Amy/Don't You Know Who I Am

My mom called my dad the "mad mover" when I was a kid - he had a knack for wanting organization and tidiness, to the point where he would often pick something up that was out of place, only to get distracted in the putting-it-away and leave it somewhere altogether unusual. I clearly got the mad mover gene, because I found all kinds of crazy things in crazy places during this little overhaul of mine.

My bulletin board, full of inspiration from the quilting world and from my world as a mom, plus two of my favorite minis - one from Ginny/Fishcreek Studio (top) and one of mine (bottom)

I've got my fabric shelves all tidy again, all organized by color, which makes me ever so happy. I even pulled a boatload of fabric to work on destashing later this month, so stay tuned for news about that. In the past, I've destashed via Instagram, and will probably choose to go that route again, as it's quick and easy.

The yardage in my stash - everything larger than a half-yard - lives on these shelves


I stow my half-yards and larger cuts on comic book backing boards that I get either from my local comic book store or from Amazon, and secure them with small tipped pins, which creates the feeling that I've got my very own fabric store to shop from when I start a new project. I keep my fabrics in rainbow order, with a small collection of multicolored fabrics at the end of the rainbow (after black).

My low volume half-yards, one of my favorite shelves

The multicolored half-yards

My blacks - accompanied by a paper weight one of my favorite bosses ever gave me

I've also got a shelf for my atypical fabrics - my linens and flannels and such, as well as a pile of voile, which I never put on the boards (too slippery) and some small pieces of my favorite fabric collection ever, Wonderland, from when I first started sewing.

My other types of fabrications - linens, flannels, etc

My precuts used to live on one shelf, all shoved together, in like sardines, but I split them up into two shelves and it's much prettier this way. I've got an award I won back in my corporate job days as well as one of my favorite gifts ever, a Cheshire cat from my assistant during my corporate job days, with the precuts. I'm not usually one to collect a lot of knick-knacks, but those things make me smile, so they get to stay in my sewing studio.

My precuts

For my scraps and fat quarters, I keep them in bins, which I've moved to my sewing studio's closet, in an effort to keep the floor a little bit emptier. I have a bin for every color, with the color name on the side, as well as an unsorted bin, for those scraps that I haven't put away just yet. I used to keep the bins stacked up high, which made accessing my scraps a bit frustrating - unstacking and restocking and all that - so this new cube shelving system allows each bin to sit independent of the others, so I can get to just one at any given point in time, which is going to make scrap busting much, much easier!

The view of my closet from my sewing chair

A glimpse inside my scrap boxes - a stack of fat quarters sits on the left and a pile of scraps on the right

My newly built (by me!) cube bookcase for my scrap bins and my Featherweight in my sewing closet

Nice labeled containers in my sewing closet - yay! It's so nice to know where everything is...for now!

My sewing closet

Also in my sewing studio closet, I've got several large tubs - one for my selvages, one for my strings, and two for my large cuts of yardage for backings. I also keep my travel case for my machine in the closet, and it stows my Featherweight. In the corner of the closet, I keep a roll of batting. I go through a quite a bit of it on a regular basis, so buying by the roll makes good sense for me.

My selvages!

Back on the shelves in my sewing studio, I keep my mammoth stash of 505 basting spray as well as my Best Press. I've got some of the new Flatter spray on its way to me right now, too, and I'm excited to try it out. I'm also repurposing some nifty Lego containers from the Lego Store to hold my Aurifloss and Cosmo floss. They look awfully pretty in those containers, and I love getting to reuse them!

My Aurifloss and Cosmo floss

My design wall sits perpendicular to my stash, right behind my sewing worktable

So, that's my sewing studio setup for the moment. It's totally subject to change, but I'm feeling good about all the purging I did in my drawers and my closet, and how tidy things are. For more details on the initial setup of the room, including the furniture and sewing worktable, click here and here. Now, I can make a mess with the best of them, but at the end of the day, I always try and at least tidy up because when I can't find things to create with, it's awfully hard for me to create. Speaking of creating, next up for me is a pair of Super Totes! Hope you enjoyed the tour today! Have a wonderful Monday :)

My current pile on my cutting table - a pair of Super Totes in progress!
Friday, August 23, 2013

My sewing space: some questions and answers

I got several really great questions earlier this week when I shared about my new sewing space - so here come some answers on this Friday morning!

Q: What's the underside of the table look like?
A: Like this (see below)...the machine sits on a piece of wood that's about three inches (give or take) lower than the table top, and the front and right and left sides of the machine are enclosed. The back side of the machine is open, to feed the cords in and to provide ventilation to the machine. Initially, all we started with was a birch table top from Ikea, but the handyman who built the table bought several additional pieces of wood from the lumber store to build the legs, the frame, and the surface the machine sits on.

The underside of my sewing table

Q: Just wondering about your sewing chair - do you like it and where did you find it?
A: My sewing chair is from Ikea and I put it together with my own two hands, which I'm fond of. It's called Vilgot, and it was really quite simple to put together, which was a pleasant surprise! I used to have a chair with arms, and I hated it, so I really wanted something armless. This chair definitely fits the bill.

My chair - an Ikea Vilgot

Q: Isn't your bobbin side-loading? How do you change your bobbin?
A: It is self-loading. The notch in the side makes it easier to grab, but if I have a tough time, there's enough wiggle room that I can lift the machine slightly to grab the bobbin door. Once the bobbin cover is open, it's smooth sailing - there's plenty of room for me to get my hand in there to change out the bobbin and to clean it out as well.

Opening the bobbin compartment

Q: How do you like your Juki for free motion quilting?
A: Love it! It definitely took some adjusting to get it just right for FMQ, which is typical for any machine, but now that I've tweaked it, it works beautifully for free-motioning. I haven't gotten to free-motion yet with my new table setup, but I hope to soon!

How is it Friday already? This week has absolutely sped past. I hope you have a great day and a fun weekend!
Monday, August 19, 2013

My new sewing space revealed!

After the big move last month, my sewing space was relegated to the last spot on my To Do list as I found homes for towels and coffee mugs and the like. We did a lot of purging with the move, so I had less stuff to unpack and put away, but it still took me a long time to start tackling my sewing space. I'm super excited to say that I officially finished getting it all set up over the weekend, and spent some time photographing the whole thing, because goodness knows it will probably never again be this tidy and organized!!

Love the natural light and the view!

Let's start with the sewing table, shall we? Quite possibly my favorite piece in the room, I finally have a drop-in table. Back it up to last year when I replaced some of my sewing furniture with some Ikea pieces, my husband planned to cut into my solid birch table top and do a DIY sewing table. Never happened. We talked of it, pretty regularly, but it never actually happened. When we moved, I was pretty firm about it, that it was time for it to happen, and after spending a day or two figuring out how to do it, he decided to hire someone to do it for him. I am so thankful he did! I love my new table, which uses my old Ikea birch table top with a whole bunch of extra wood.

My new sewing supercenter in the center of my studio

The cut out is totally custom, meticulously traced by my dear husband from the foot print of my sewing machine. The machine sits on a supported wood frame under the desk, with a front facing piece to keep it pretty that has a hole in just the right spot for my knee lift. We made sure to add some extra wiggle room right where the cords come up for the machine, so none f the cords get bent out of shape. I painted the table legs white, and I might paint the rest of the wood at some point as well, just not right this moment. 

Smooth sewing ahead!

I've kept the drawer bases that I used to use to hold up my sewing machine table - I need the storage! I put one under my new sewing table and the other under my cutting table. I've got my sewing necessities in the one under my sewing machine table, like my needles and thread and sewing machine feet. And because the sewing table is taller than it used to be, I've got room to house my laptop on top.

Thread, thread, and more thread!

My cutting table now backs up to my sewing table, and their heights match perfectly, so it's like I have one big table in the center of my space, which I really like. It's the same table I've been using for cutting for quite a while.

Cutting storage cup from Target

It's my dad's old desk. I have a lot of memories of my dad working at this desk, so it means a lot to me that I'm able to use it in my space. I have it sitting on 2 x 4's to raise it to an ergonomic height for cutting, which isn't the most attractive thing in the world, but it works. I've added some 3M Command hooks to the sides of the desk as well as the wall near my cutting table for my cutting rulers, which is working out really nicely so far.

Command hooks for easy ruler hanging

I replaced my old Target bookshelves with Ikea Billy bookshelves, with doors, and I really love the finished look. I love how tall they are, and how much more I can fit in them as a result. I've got my fabric all unpacked and situated, in color order of course, with the half-yards and larger on the comic book backing boards, and the precuts and yardage that needs to be put away on the lower shelves on the second bookcase. The third bookcase houses some samples from my classes, important mementos, and supplies.

My new Billy bookcases

My scraps and fat quarters now live together in larger bins that I stack up along the wall where my design wall is. I'm mostly using fat quarters these days the way that I use scraps, so this works well for me. I've got so many darned blue scraps and fat quarters that I had to separate my light and blue scraps and fat quarters into two separate bins.

Scrap and Fat Quarter Storage

While I desperately need to clean off all the random threads from my design wall, I'm just happy it's up and staying that way at the moment. Our first mounting solution, 3M Command hooks, didn't work out and the darned thing randomly fell down a week or so ago. Now, there's a more permanent solution, with plastic hangers that are nailed to the ceiling, and it's holding steady so far.
Design wall paired with my handy dandy bulletin board and a few favorite minis - top one made by Lee/Freshly Pieced, bottom one by me

I love all the light in my new sewing space, and I'm excited to start making a big fat mess in it this week, with school starting today! I cannot believe that my little boy is heading off to kindergarten today. I better pack some tissues in my purse right now before I forget, as I suspect there's no way I'll leave the school with dry eyes. Have a great Monday!
Friday, July 26, 2013

Settling in and unpacking an old project

It's been a long couple of weeks, but we're officially moved into the new house! Yay! Now the settling in has begun, from unpacking to organizing to decorating. I know I've still got a long way to go, but it's going pretty well so far, especially now that I've started to work on my new sewing space.

Going from a mess o' thread to nice organized thread

I'm totally loving the new neighborhood and house, and I'm loving all of the light in my new sewing room! I haven't spent as much time as I'd like in there yet, getting things set up, but yesterday after organizing the closet and hanging my bulletin board, design wall, and a few favorite minis, I decided it was time to turn on the sewing machine. It felt like it'd been eons since I've sewn - so I was definitely jonesing to make something. I wanted to sew something small, something that wouldn't take too long, but that would help me get just a little bit of my sanity back!

Bulletin Board and Minis in my new sewing space


So, I turned to a project I haven't worked on in almost two years: the Farmer's Wife Sampler. AnneMarie busted hers out earlier this summer, which put the idea in my head. I really hadn't given the project much thought since I set it aside, but breaking it out of the box really put a smile on my face. I had forgotten just how many blocks I'd made so far - 37 out of 111! So, I think over the next couple of weeks as I finish up this whole settling in business, I might just make a few more of these guys. They were crazy quick to put together, and awfully satisfying.

Farming away


The first block I worked on was block #37, Flower Pot. I didn't really notice at first that the block required Y-seams, but I didn't let that stop me when I was piecing, I just kept on trucking and they turned out just fine. I forgot how quick even the more involved Farmer's Wife blocks are! That's the beautiful thing about 6" blocks, they're great for little bursts of sewing time, even if they have challenging bits.

Flower Pot - FW Block #37


I couldn't resist putting together a second block after the first one came together so quickly. I chose the Friendship Star, block #41, knowing it would be really easy to sew up. I used one of my favorite, classic color combos: red and aqua. I like the way that not only the colors contrast one another, but the prints are somewhat contrasting as well, with the red print being much more harsh and geometric than the softer aqua print.

Friendship Star - FW Block #41


As I stepped outside to take pictures of my finished blocks, I happened to catch a deer family in the backyard. It's been such fun to see all the wildlife in the conservation that our new house backs up to. I get positively giddy when I see these beautiful deer!

Mama deer and her littlest baby


I hope you're all having a great week! Where did the week go? It's going to be August next week, can you believe it? Just a few short weeks before school starts back up around here! Have a great weekend :)
Wednesday, February 13, 2013

One of my paper piecing secrets

At the TMQG sew day over the weekend, I chatted a good bit about paper piecing, and in doing so, I realized that I've never shared here about one of my favorite tools for paper piecing - my telescoping Ott-Lite.


On a whim, I picked it up at Jo-Ann's one week when they weren't on sale and I had a killer coupon, and I haven't regretted it a bit. My sewing room does get a good bit of natural light during the day, but I don't always get to sew during the day, so if I'm working at night, a super bright light is absolutely necessary for helping me see where I'm lining up my fabric.

nighttime paper piecing, thanks to the Ott-Lite

I also really like to use it when I free-motion quilt, because it really does give off a lot of light. I remember when I first saw these things at Jo-Ann's, I positively scoffed at them. I thought they were totally unnecessary and that the light couldn't be that different from a regular old light, but it truly is. If you are a blogger who likes to do tutorials, these lights are great for lighting any step-by-step photos you want to take in your sewing room, because the light doesn't look artificial, it looks very clean.

Do you have any unexpected tools that you swear by in your sewing room? I'd love to hear about them! Have a great day :)
Tuesday, July 31, 2012

Just couldn't leave well enough alone...

Remember when I shared my sewing room earlier this month and mentioned how I was thinking about redoing things? Well, I couldn't leave well enough alone...that process has gotten started, but thanks to my husband's work schedule, it is so exactly done at the moment. Still a work in progress.

Initially, I wanted a Horn sewing cabinet. Something with a custom insert for my machine, a big surface, drawers for storage, etc. After nearly fainting over the cost of those bad boys, I started dreaming of an Ikea hack of some kind. I'd seen several on Flickr and Instagram. After scoping out the build-a-desk area at Ikea, measuring things a zillion times at home, I wound up trekking to Ikea with the family on Saturday after I saw Amy's post about her Ikea sewing table. I usually buy furniture without much thought about what my husband thinks about it, but for this, I needed help and advice. I wasn't sure what would be sturdy and what wouldn't. Turns out he doesn't really either, but that's another story.
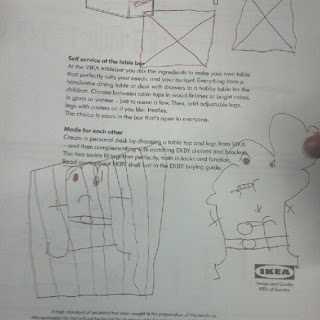
Lots of paper in the Build a Desk section plus cute little pencils meant lots of drawing for the kiddo while the grown-ups talked about furniture
The other thing I was really hoping to accomplish was to create an L-shaped workspace, where I could not only rest the bulk of a quilt that I'm quilting, but where I could maybe do my cutting and have my computer for blogging and pattern writing and such.

On my first trip (yes, there are more) to Ikea, I wound up with:
one 59" x 29" table top to put my sewing machine one
one 78" x 24" table top to set up perpendicular to the machine table
one set of drawers to use as a table base
six table legs

During the assembly, we discovered that we needed an extra table leg for the center of the super long table, and that one of the pieces of the drawer unit was broken, so back to Ikea my husband went.

On the second trip to Ikea, we wound up with:
one table leg
a new piece to replace the broken drawer piece

After lots of assembly on Saturday night, I was really excited to start to get things put away. I didn't even think about how the tables would behave when I turned on and used my machine. When I finally did turn it on some time on Sunday, it was bad. The table bowed and shook like there was a huge earthquake. I cried. A lot. I cried because my husband was getting ready to leave for the week so I was going to be stuck with a table I couldn't actually use, I cried because we'd bought all this stuff from Ikea and it just wasn't working the way  I needed it to and I was terribly frustrated. And I think more than anything, I cried because I wanted my dad. It's been nearly ten years since he died, and it's still painful. He was the fixer in my family. Cars, furniture, you name it, he made it work. Somehow. And in that moment, I felt like no one was going to be able to make all of this better but him.

I pulled it together, dried my tears, and sent my husband off for work, but being the good man he is, he called his parents (who have a much bigger car), and they came over to let me borrow their car to return the legs and top for the sewing table. I talked with the Ikea staff, and they recommended using a fully wooden table top as well as drawers for the bottom, to provide the most stability. My father-in-law, though, thought that these wooden trestles would be more secure. In the end, I compromised and did one of each, feeling completely unsure what would work.

On my third trip to Ikea, I wound up with:
a pine 59" x 29" table top for my machine
a wooden trestle table base
another set of drawers to use as a table base

I put the trestle and drawers together, and lifted the big wooden table top on top. It looked nice, but that didn't mean much of anything until I turned the machine on. So I did. And the table still shook. Nowhere near as violently as it did before, mind you, but it still shook. Argh. The husband suggested that I swap out the trestle with the other drawer unit that I had with the other top, so I lugged that bad boy over to the sewing table. That helped. But again, there's still some vibration.

IMG_9934rt

The way things stand right now, the set up works, physically speaking. It's big, it's roomy, I've got drawers to store things in, but the darned machine table still seems to vibrate a lot when I sew. Part of me is thinking about putting my machine in my old table to try to compare the amount of vibration, because I seem to recall that it vibrated, too, I just can't remember how much. Does the surface you sew on vibrate??  Ultimately, we were planning on cutting a whole into the table to create a custom drop-in for my sewing machine, but I'm worried that will make things even less stable. So for now, things are staying as is. The husband will be home for the weekend and will hopefully have some ideas how to further stabilize the table.

IMG_9929rt

In the meantime, I'm trying to get things settled and put away. I wrapped up a little block yesterday for Amy/Sukie to send off, and I'm getting ready to work on a lone starburst bee block for Brioni. I'm hoping using some super fun happy fabric will take my mind off all this desk drama. Thank goodness for fabric!

Welcome! I'm Elizabeth, mom to a mood teen boy and a chatty six-year-old girl and I sew for my sanity. Let's get to quilting, shall we?
The Epic Sampler BOM Club kicks off Oct 1st
Copyright 2010 by Elizabeth Dackson. Powered by Blogger.

Search This Blog

Tutorials

 photo Icicle-Star_zps7f032133.gif  photo Boxed-In2_zps800ae9da.gif EasyPeasyFauxZigZag StringHeartBlock StarCrossed CrossMAze CathedralStar RainbowRing DoubleFlip PatchworkWheel FriendshipOctogon FlyingGeese HST Weathervane MarinersStar StackedScrappyBlock ScrappyAngles HolidayPresentBlock DivideandConquer CharlestonFarmhouse ModernHalves ModCircuitry ModNine Kaleido SlicedCoins Kaleido BellaCrossing SweetGirlie MiniBookshelf ClamshellLoop DoubleHourglass BaptistFan TetrisMug StringDiamond ScraptasticTote OffsetDiamonds MunchkinSoftBook PatchworkBathMat