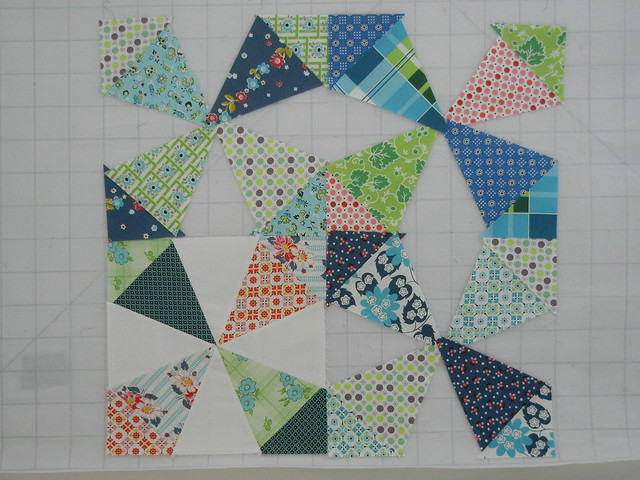
Have you started to play with your blocks yet? If not, here's some of the awesome block layouts popping up in our fantastic Flickr group. If you haven't joined in the Flickr group yet, you are seriously missing out on some major quilty eye candy!

1. Kaleidoscope QAL, 2. Kaleidoscope quilt-along progress, 3. Kalidescope pieces, 4. Kaleidoscope QA Layout Idea, 5. photo.jpg, 6. With Backing, 7. 270517_10150687093590204_653655203_19547430_4810628_n, 8. Kaleidoscope QAL - Layout, 9. sample block, 10. Kaleidoscope layout, 11. Kaleido layout #2, 12. Untitled
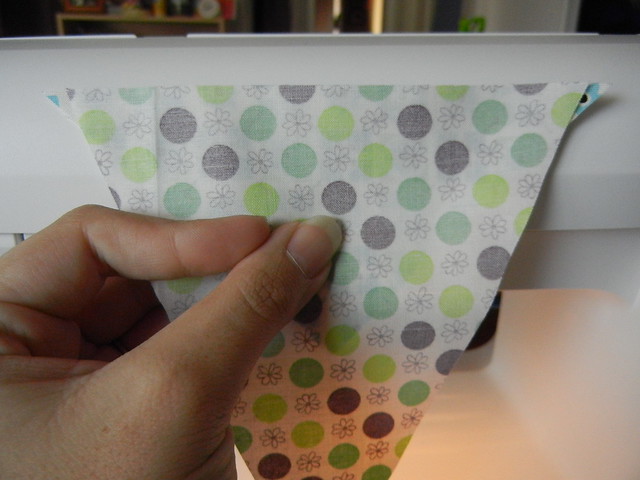
So...now is the time to make a design decision! This week, we'll be making our kaleidoscopes for our blocks - marrying and seaming our corner triangles with one single kaleidoscope triangle. So, the first step is to decide which kaleidoscope triangles you'll pair up with your corner triangles.
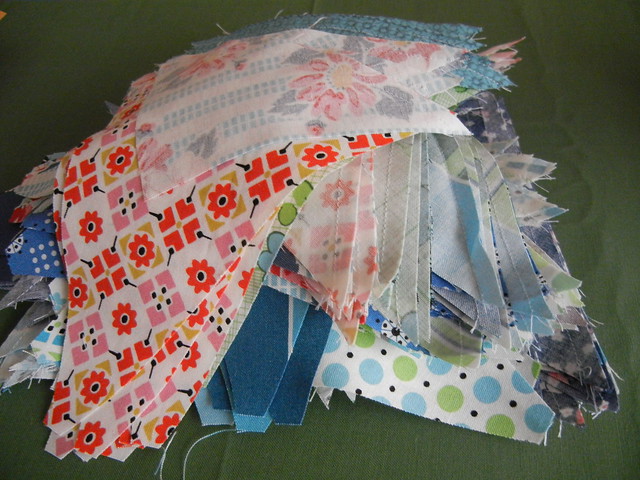
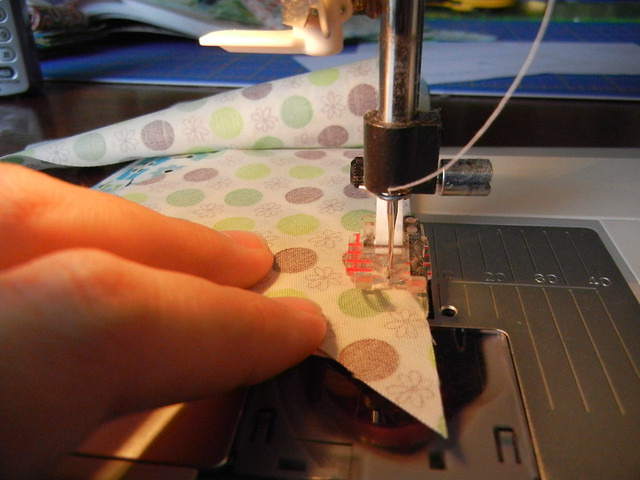
Chain piecing is really helpful with this step of the piecing. Here's what I did to get ready to chain-piece my corner triangles and kaleidoscope triangles. First, I made piles to match up my corner triangles with their corresponding kaleidoscope triangles, based on the design decisions I've made so far. Second, I wound up a few bobbins (but I only wound up going through one). Third, I started lining up my corner triangles on top of each kaleidoscope triangle, one at a time as I fed each pair through my sewing machine. Here's what a correct pair ought to look like:
Notice how I don't use pins? When piecing like this, I rarely use pins these days, especially when piecing things this small. When I piece my two block halves together, I will use some pins, to make sure my seams line up and stay that way. If you're more comfortable using pins, go for it.
Make sure you've got dog ears from your corner triangle sticking out evenly on both sides of your kaleidoscope triangle. This may take a little bit of practice, but trust me, you'll get the hang of it. Then once you do, turn on the music, and chain piece away, using a quarter-inch seam!
I am a open-seam-presser when it comes to 99% of the sewing I do. I find especially when working with bias seams, like in triangles, that it leads to more accurate work, but again, do what you are most comfortable with when pressing your blocks.
Now, you can finalize your design decisions, now that you've done some of your piecing. You can still move things around to find a layout that pleases your eye at this point! Your final step for this week is to make sure you've got all of your background fabric cut up and ready to roll, and to take some photos to post to the Flickr group. We'll be finishing off our blocks next week, with some tips and tricks that I've picked up to make this as smooth as possible! Again, don't hesitate to post a question in the Flickr group or to email me directly! See you next week :)


Thank you for such nice instructions and great pictures. I am hoping to get going on this over the weekend.
ReplyDeletei am impressed with the lovely quilts that people are making! such eye-candy!
ReplyDeleteCool beans I can get to sewing! I'm so excited :-)
ReplyDeleteOh, yay! That sounds manageable! I'm thinking I might just go for scrappy...
ReplyDeleteGotcha - I think we can handle that!
ReplyDeleteYoure all going to laugh at me now... Whats the seam allowance again? x
ReplyDeleteThat's a quarter-inch seam, thanks for asking!!
ReplyDeleteYea!! Here I go... again! :)
ReplyDeleteI'm lagging behind terribly due to work demands, but also terribly inspired by the Flickr group! So many lovely color combinations and layout ideas. Thanks for the bobbin reminder too - its a good habit to check often. Reduces the amount of swearing in my sewing room. :)
ReplyDeleteFun! I still haven't cut my triangles (SOMEONE aged 3.5 years didn't go to sleep at her normal time last night so Mama didn't sew), but hopefully I'll be caught up next week. Loving this so far!
ReplyDeletep.s. would you put me onto the KQAL blogroll over there on the right hand side? pretty please? :)
ReplyDeleteDo we need to leave the dog ears on? Or should I clip them off?
ReplyDeleteI love everyone's colors.
ReplyDeleteLook at all the pretty! Now I'm officially behind, but hoping to catch up this weekend!
ReplyDeleteThanks again E for really fab instructions. I'm a little behind in my cutting, & s.machine in the shop at the mo, but will get caught up in time. Jxo
ReplyDelete