This year, I'm having a lot of fun with the Stash Trad bee. It's a group of amazingly talented quilters who have a love for messing with traditional blocks with a modern twist. Lee made us a fabulously apropos button for the bee, with that very motto in mind.
April is my turn in the group, and I waffled a lot this month, thinking about what to ask the girls to make for me, and I kept coming back to the Rolling Stone block, which dates as far back as 1898, credited as being listed in the Ladies' Art Company Catalog.
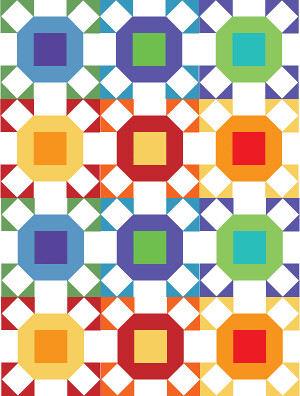
Much as I like the block, I wanted to do something a little different with it, so I fooled around with the color placement, using four colors rather than two and creating an octogon or ring in the center of the block. Then, I decided that I wanted to do something really colorful, so I played around in Illustrator until I came up with this fun layout:
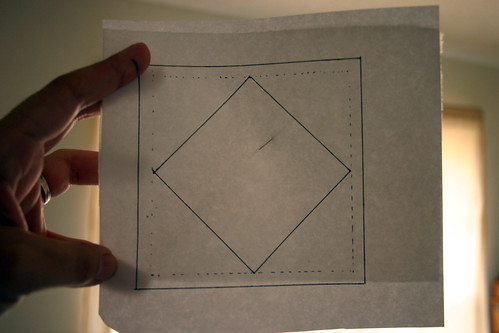
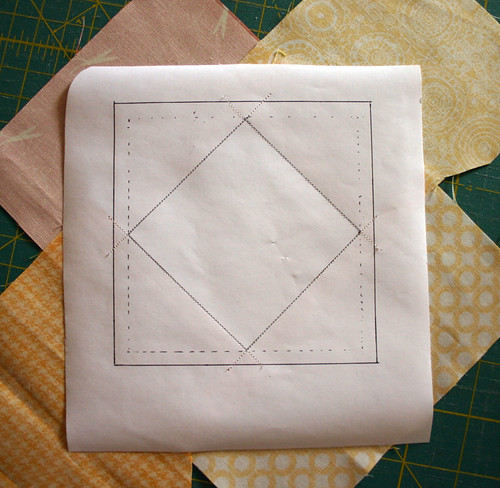
After some trial and error, I found that paper piecing the corner units of each block is the most accurate way to piece these blocks, so I've created my first paper piecing template. It's hand-drawn because Illustrator and I couldn't seem to see eye-to-eye, but this template works great for this block. And if you've never paper pieced, don't worry! This is super easy-peasy paper piecing, I promise it will be painless :)
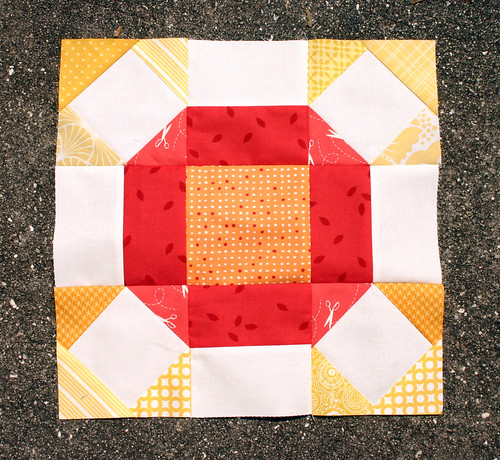
Radiant Ring block
12.5" unfinished block
This block tutorial is written for using one neutral color as well as three additional contrasting colors. In my block, I used warm colors for color A, B, and C, but I think a scrappy version of this block would also be amazing.
4 neutral 2.5" x 4.5" rectangles
4 neutral 5" square
1 orange 4.5" square
4 red colored 2.5" x 4.5" rectangles
4 red colored 3.5" x 5.5" rectangles
12 yellow colored 3.5" x 5.5" rectangles
All seams are a scant 1/4" unless otherwise noted. All paper piecing done with a 1.5mm stitch length.
1. Print four copies of the Radiant Ring Template for each block you're making. Cut your fabric, and keep in mind that you'll be using the 3.5" x 5.5" rectangles are used for paper piecing. This size worked nicely for me when I was piecing, but you may want to make adjustments after your first block.
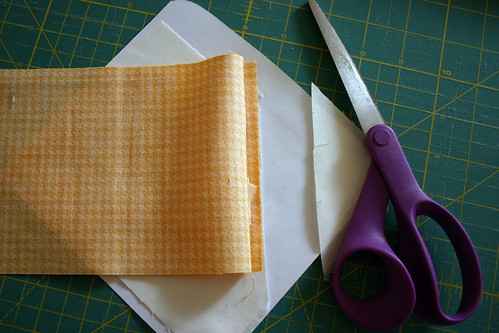
2. Let's get the paper piecing out of the way. If you've paper pieced before, this is going to be a breeze, and if you haven't, that's okay, too, I'm going to make this as simple as possible. We're going to be making the four corner units using one template each. First, place one neutral 5" square right side out on the back of template, making sure that your square covers the entire template square. Pin in place, in the center.
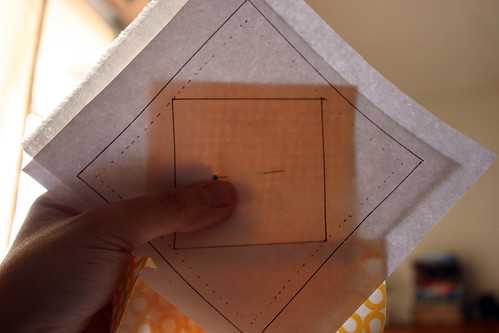
3. Next, take one of your yellow 3.5" x 5.5" rectangles and line up the long side side so that approximately 1/4" overlaps over the seam line for part A of the template, making sure that the right side of the fabric face down onto the paper. Pin in place, if necessary, and stitch in place. Be sure to stitch into the seam allowance to lock the fabric in place.
5. Next, flip your template back over so the template faces you. Take another of your yellow 3.5" x 5.5" rectangles and line up the long side side, with the right side of the fabric face down onto the paper, so that approximately 1/4" overlaps over the seam line for part B of the template, which is directly across from part A. Pin in place, if necessary, and stitch in place. Again, be sure to stitch into the seam allowance to lock the fabric in place.
6. Repeat step 5 for your final yellow rectangle, using part C of the template.
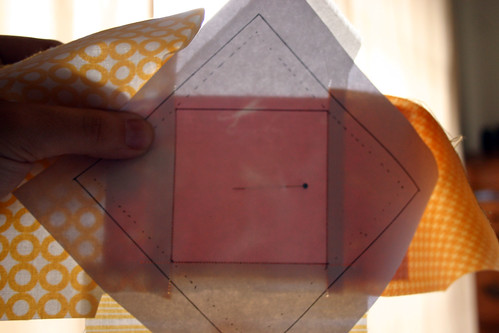
7. Flip your template back over so the template faces you again. Take one of your red 3.5" x 5.5" rectangles and line up the long side side, with the right side of the fabric face down onto the paper, so that approximately 1/4" overlaps over the seam line for part D of the template.
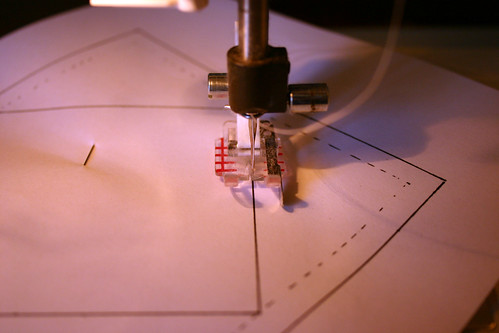
Pin in place, if necessary, and stitch in place. Again, be sure to stitch into the seam allowance to lock the fabric in place. Press your seam open and bring your finished template over to your cutting table.
Ugly, right? Let's fix that!
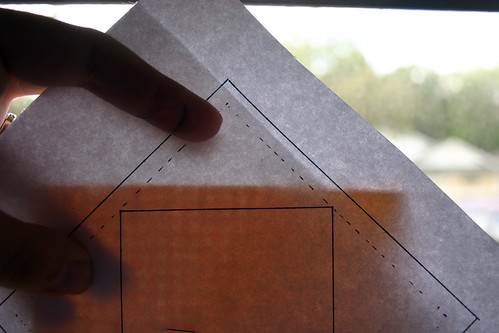
8. Place your template paper side up for this step.
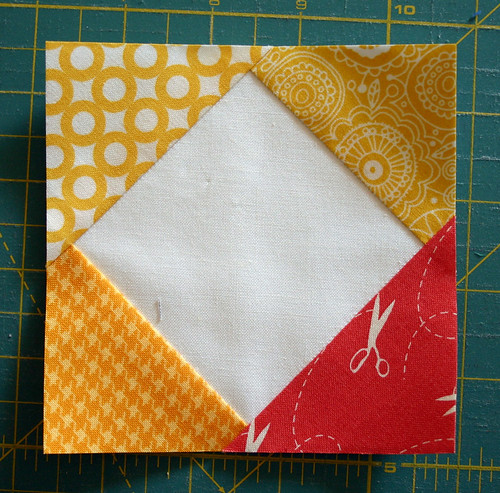
Disregard the dotted line and trim all the way around the solid black square line of the template, and voila! A simple paper pieced square in square! Marvel at your paper piecing prowess for a moment, and then move on to the next step ;)
8. Next, let's build the other subunits for this block. Take the four 2.5" x 4.5" neutral rectangles and pair each one with a red rectangle of the same size. Seam each pair together and press seams open.
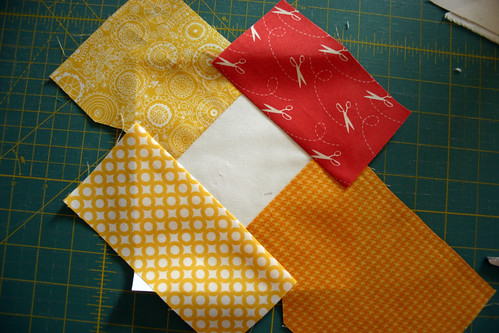
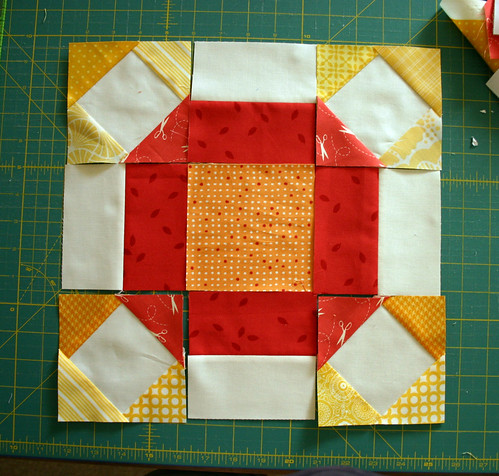
9. To finish your block, we're simply going to sew the nine subunits we've created together, in rows of three. First, lay out your subunits as shown below.
Then, remove the paper from the back of your corner subunits, which should be fairly simple. Your stitches perforated the paper, so simply fold back your paper and pull. Repeat for all subunits. Stitch each row of three together, then stitch the three rows together, and voila! A finished gorgeous 12.5" block.
I hope you enjoyed this tutorial! If you make a Radiant Ring block, I sure would love to see it in my Flickr group, Stitching with Don't Call Me Betsy! Happy Monday :)
A note to the Stash Trad gang: Please make either a Warm or Cool block, using Kona Snow as your background color, and don't hesitate to let me know if you have any questions.







Um, Elizabeth? Have you been reading my mind? I worked on a couple of these blocks yesterday and decided last night that I wanted to use it in my next bee quilt. So glad you've done a tutorial for it so I have a place to send everyone! Can't wait to see what your bee members do with it!
ReplyDeleteAWESOME block Elizabeth!
ReplyDeleteLove your mock-up. And thanks for the perfect paper pieced corners! Great block.
ReplyDeleteVery fun!! Thanks for sharing.
ReplyDeleteGreat tutorial!! I really like your color placement. : )
ReplyDeleteAwesome tutorial! Thanks for doing all the work so I can have f.u.n!
ReplyDeleteVery nice, E! Thanks for the tutorial. And I'm with you--it's been too nice outside to spend too much time behind the sewing machine!
ReplyDeletegreat tute Elizabeth! This quilt will be great when it all comes together :-)
ReplyDeleteGreat tutorial Elizabeth and so simple when you break it down I am always amazed at how straightforward these blocks are when they are explained otherwise I wouldn't have a clue! Thank you so much. Going to try one of them tonight! Fi
ReplyDeleteThis will be a fun quilt! Thanks for the tutorial!
ReplyDeleteI can't get it to print the pattern,what am I doing wrong? Love your block, thanks.
ReplyDeleteSo cute and looks hard but once you broke it down, it is deceptively easy to put together- love it when that happens!
ReplyDeleteGreat choice of block, Elizabeth! And as usual, you've done a great job with the tutorial, thank you for sharing!
ReplyDeleteYou are incredibly generous with your tutes!!! Thanks.
ReplyDeleteGreat tutorial. Thank goodness for foundation paper piecing!
ReplyDeleteBeautiful colors, Great Paper Pieced Tutorial. Thanks for sharing¡¡¡
ReplyDeleteI have been playing around with this block myself!! So glad you made a wonderful tute... the Eugene Modern Quilt Guild will be using it this month for our sampler!! Thanks a BUNDLE!
ReplyDeleteI just discovered your blog and thought you might like to see my take on your radiant ring block. I found the instructions in in Judy Hopkins book of blocks.
ReplyDeletehttp://melibismakingthings.blogspot.com.au/2012/04/couple-of-finishes.html
PS Love your blog and your work