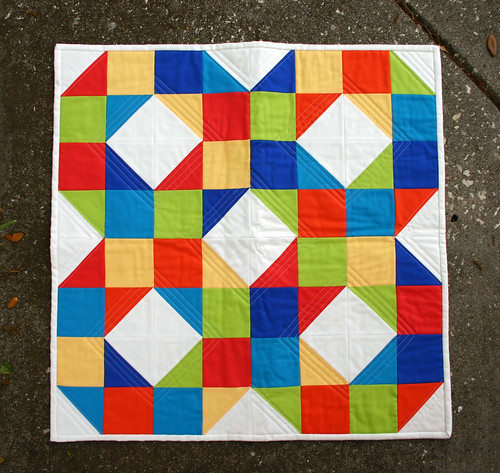
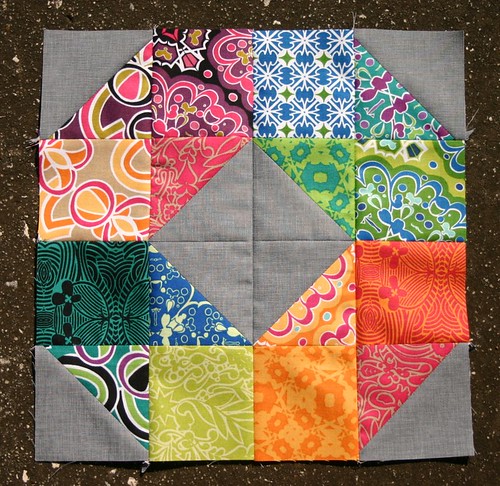
This super easy block tutorial shows exactly how I made the lovely mini I shipped off to my partner in the For the Love of Solids swap. When I made the mini, I made four of these blocks, and you'll see when you stitch these blocks together, they create a gorgeous, interlocked look.
I definitely plan to make a scrap quilt using this block at some point in the near future, as my scraps are starting to take over my sewing space!! Perhaps over the summer, we could stitch up some of these blocks together? Maybe as a tame-the-scraps-along?
This particular block has a rich history and dates back as far as the 1930's. It was first published as a Cheyenne block, by the
Kansas City Star in September of 1933, but later in the 1960's was referred to as a Rock Garden block by
Quilts magazine. When I look at this block, full of a rainbow of focal colors rather than two focal colors (dark and medium) as in the original, I see a patchwork wheel and that's how I came up with the name for this block.
Thanks, Mark and Cara, for the gorgeous
Cosmic Burst fabrics to play with - I paired them with gray Robert Kaufman Quilter's Linen for this particular tutorial, and I love how the bright colors pop against the gray.
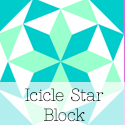
Patchwork Wheel Block Tutorial
12.5" unfinished block
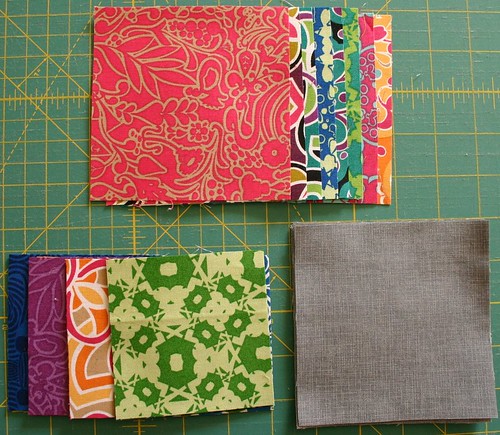
You'll need:
(8) 3.5" squares in various colors/prints
(8) 4.25" squares in various colors/prints
(8) 4.25" squares in a solid/neutral print
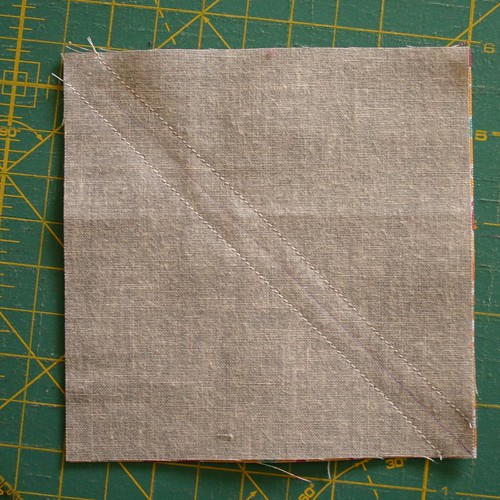
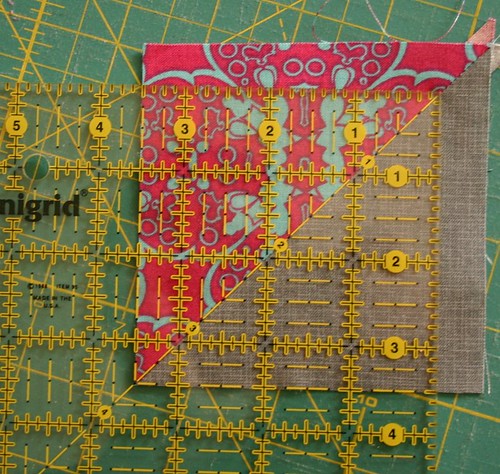
1. Draw a diagonal line on the back of your neutral squares. We will be using these to create half-square triangles. Then, match up each neutral square with a colored/printed square, right sides together, with the line you've drawn facing you.
2. Stitch a scant 1/4" seam on either side of the line you drew, then cut along the line to create two half-square triangles (HSTs).
Press your HSTs and trim down to 3.5".
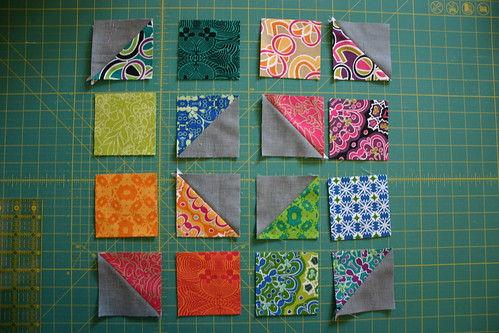
3. Lay out your squares and HSTs as shown below, then stitch sub-blocks together in pairs to create the four rows for this block.
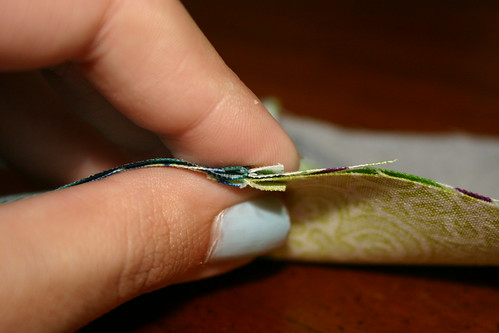
4. Stitch rows together, taking care to line up the seams as you go.
5. Enjoy your finished block!
As always, if you use this tutorial to make some Patchy Wheel blocks of your own, please add them to my Flickr group,
Stitching with Don't Call Me Betsy. I'd love to see them!


pretty! Thank you for the tutorial!
ReplyDeleteGreat block! Thanks so much for the tutorial!!
ReplyDeletekiki-itssewkiki.blogspot.com
Cool! Thanks for the tute!
ReplyDeleteVery pretty, Elizabeth! I love all the different secondary designs when you put the blocks together. Definitely a fun way to use your scraps!
ReplyDeleteOoooh! The cosmic burst looks great in this pattern!
ReplyDeleteCute little block! You're right, it would make a great scrap quilt.
ReplyDeleteSuper fun block, great tute Elizabeth! (and I love your blue nail polish :-) )
ReplyDeleteAnother great block...love it!
ReplyDeleteLOVE this!!!! You keep adding to my list of must do!!!!! I will have a MILLION wips by the end of the year :o) Thanks for a great tutorial :o)
ReplyDeleteThis is a great quilt block, Elizabeth. Thanks so much for the tutorial.
ReplyDeleteI love this! All the vibrant colors are awesome. And thanks for the tutorial.
ReplyDeleteWow that really is simple. It's amazing how you see things differently once they're broken down. Bookmarking this =D
ReplyDeleteI'm holding a small swap over at my blog if anyone is interested please pop over for a look =D
http://ibescheraldine.blogspot.co.uk/2012/03/anyone-want-to-swap.html
Oooh, looks fab as a cosmic burst block
ReplyDeleteI love this! I just did 2 rainbow charm square swaps that this tutorial will be perfect for. Thanks so much for posting
ReplyDeleteReally gorgeous block! Love it scrappy and with solids :)
ReplyDeletethanks for the tutorial. . . love it
ReplyDeletethanks for the tutorial. . . love it
ReplyDeleteGreat tutorial and great fabric! Thanks for sharing!
ReplyDeleteThanks for the tutorial! Great directions and easy to follow. I have a question though: Do you press your seams open?
ReplyDeleteI love this block!! I really like how Cosmic Burst looks with the gray linen.
ReplyDeleteThis is beautiful! Thank you for the tutorial. My scrap pile is going to take a serious hit now!
ReplyDeleteI think I found the perfect block for my guestroom quilt!! Now to figure out how many I'm going to need!!
ReplyDeleteI just saw this block on another blog that sent me here. I know this is an old post but I hope you can answer a question. How big is this finished? Was it hard to get all the points to match? Thanks for reading my post and thanks for the tutorial.
ReplyDeleteThis is my summer of scrap busting and I would LOVE you to do a scrap along with with this block/quilt. It would be just the motivation that I need.
ReplyDeleteWe're about to use this for our charity quilts for our guild. Thanks for the fun inspiration.
ReplyDeleteThanks for the tutorial! I'm a new quilter and haven't tried triangles or any type of real pattern! This just may be my first!
ReplyDeleteThank you for this splendid tutorial, I saw it over at Annabelle's blog. It's just scrumptious.
ReplyDeleteThis is wonderful. Thank you for the tutorial. I am ready to make a baby quilt and my neice doesnt want to know if its a boy or girl. This would be perfect.
ReplyDeletethanks so much for posting, great tutorial can't wait to make one
ReplyDelete